
Behind the Scenes
Project Legacy School Exterior
In this article, we aim to delineate our workflow in processing some of the images from this remarkable project.
Recently, we have been working on the Legacy Magnet School project. This endeavor facilitated remarkable cooperation and provided us with the opportunity to learn a plethora of new techniques.
In this article, we aim to delineate our workflow in processing some of the images from this remarkable project.
Each project possesses its own unique characteristics, and the Legacy Magnet School project was no exception. From the outset, it captivated our attention with the client providing a pre-existing 3D model along with a rudimentary concept of the materials to be used. The final material solution gradually took shape throughout the visualization creation process and was refined through multiple consultations. The client was afforded the chance to explore various color schemes and select the most suitable and convenient option.
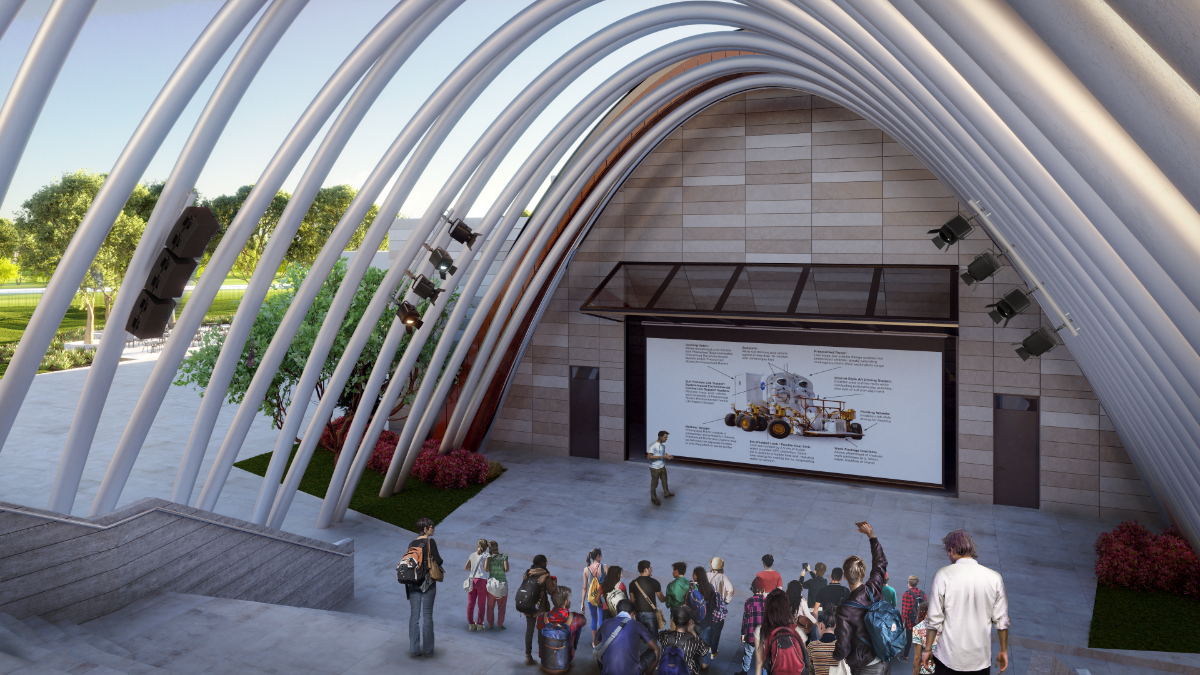
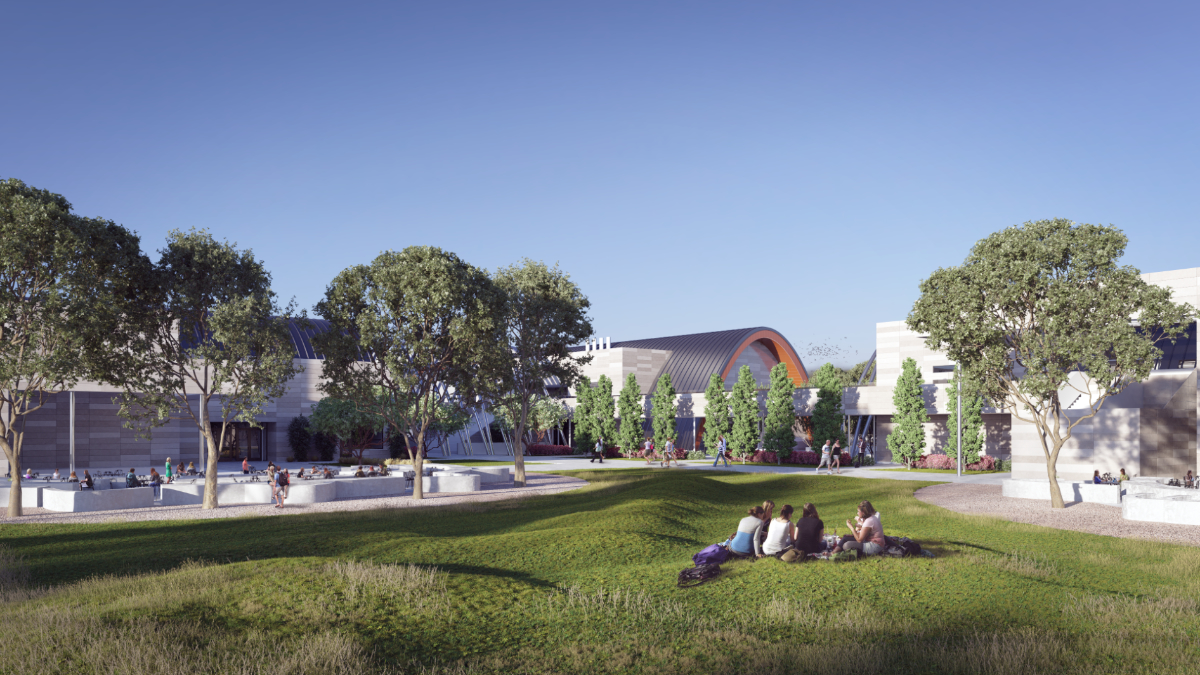
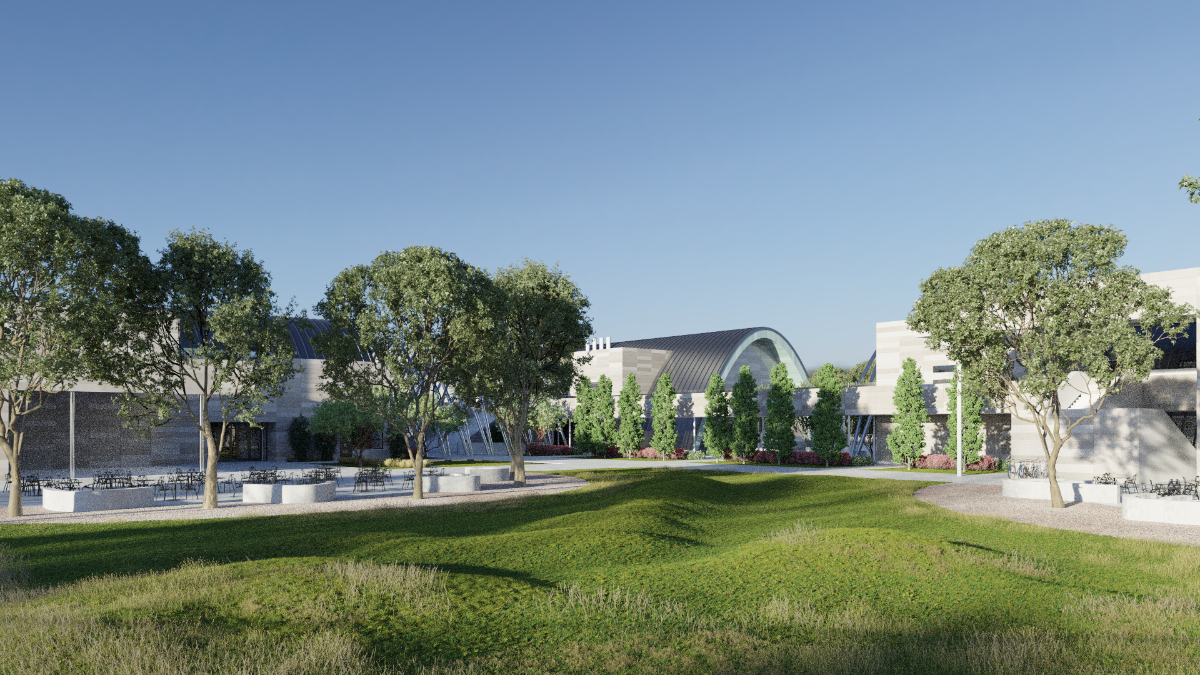
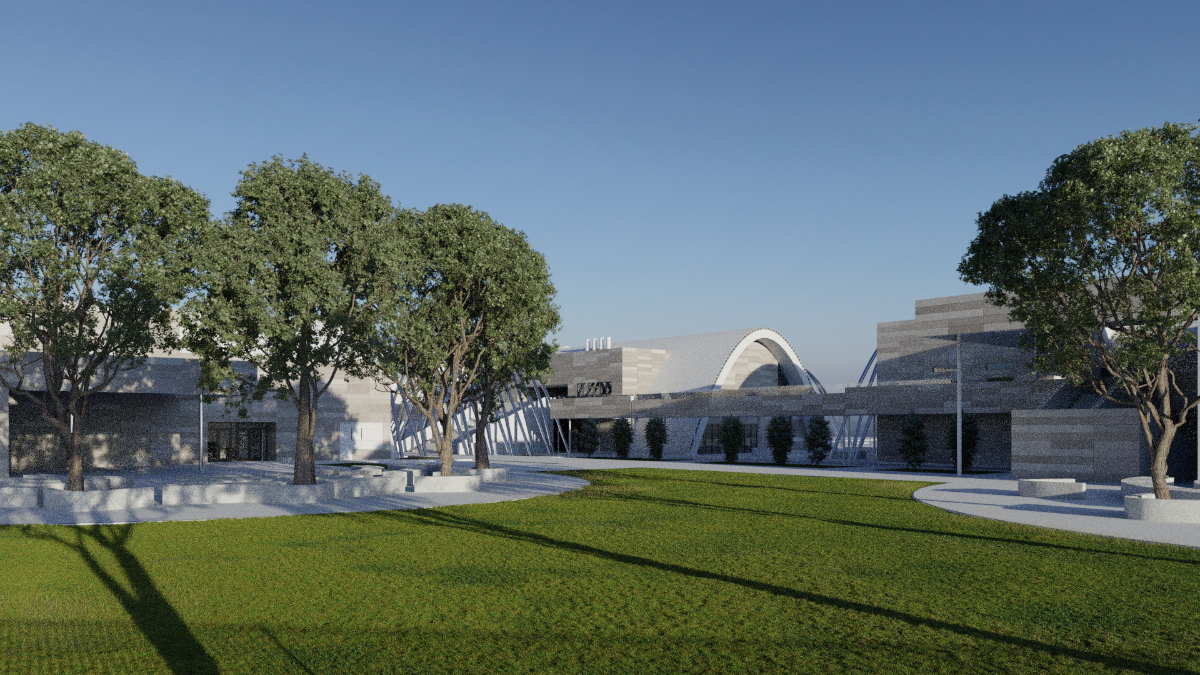
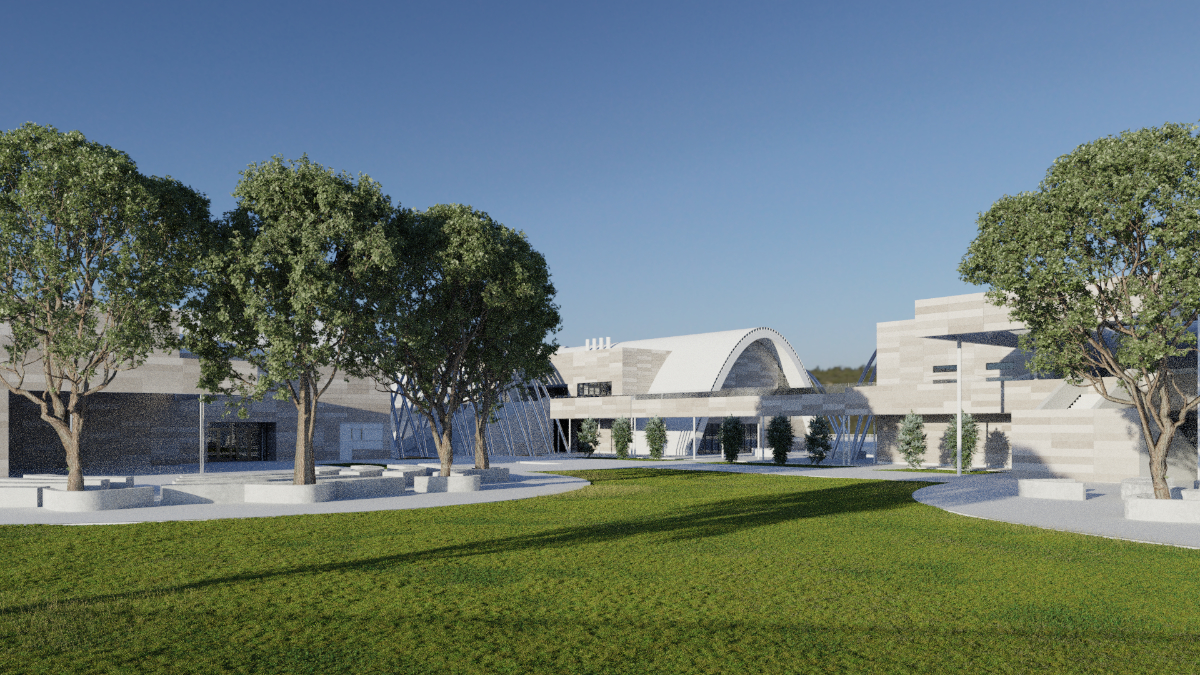
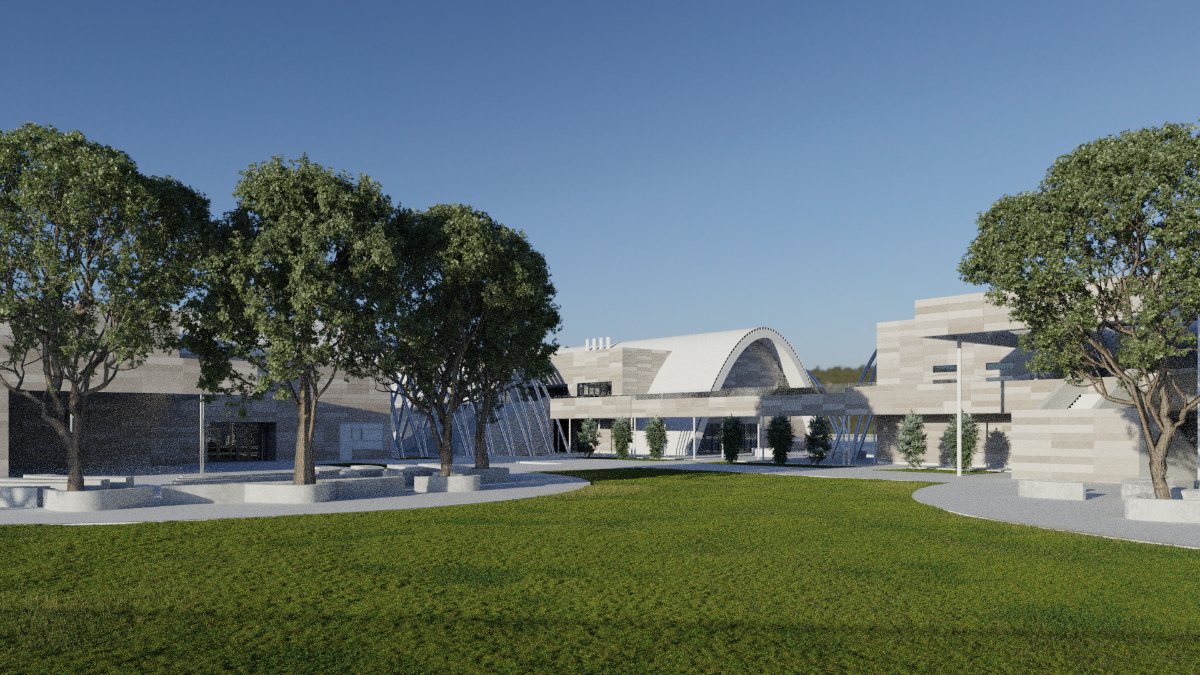
Let’s commence by introducing the school campus area, undoubtedly one of the most captivating facets of this project. Through this image, we endeavor to encapsulate the essence and ambiance of the future school.
Our collaboration with the client commenced with them providing a screenshot from SketchUp, outlining their vision for the camera’s positioning.
Comparing to the final render, you can observe the simplicity of the color palette we employed. A basic combination of green and blue complements the white walls. Our intention was to direct the observer’s attention toward the color accent utilized on the facade of the building.
Workflow
Initially, we imported a 3D model created by the client in SketchUp into Blender.
A clean and well-constructed model can significantly save time and effort. It’s not uncommon for client models to be disorganized, in which case it’s often more efficient to rebuild the geometry from scratch. However, this was not the case here; we received an aesthetically pleasing, high-quality model from the SketchUp file to work with.
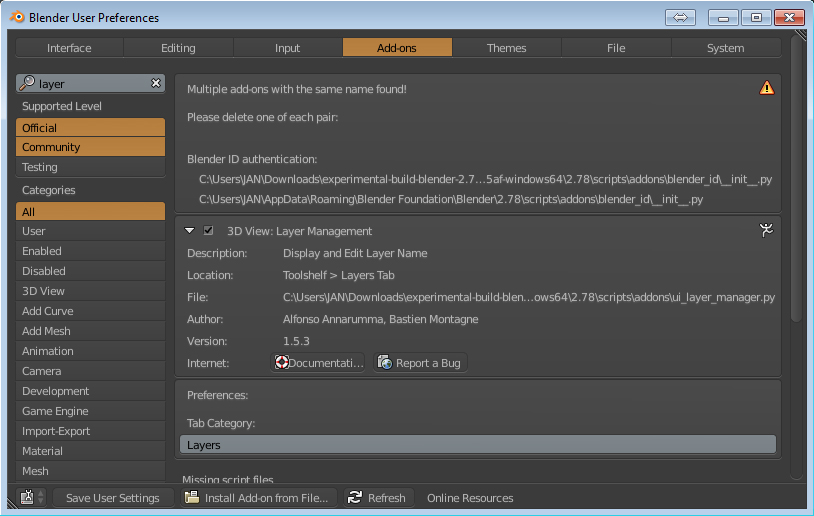
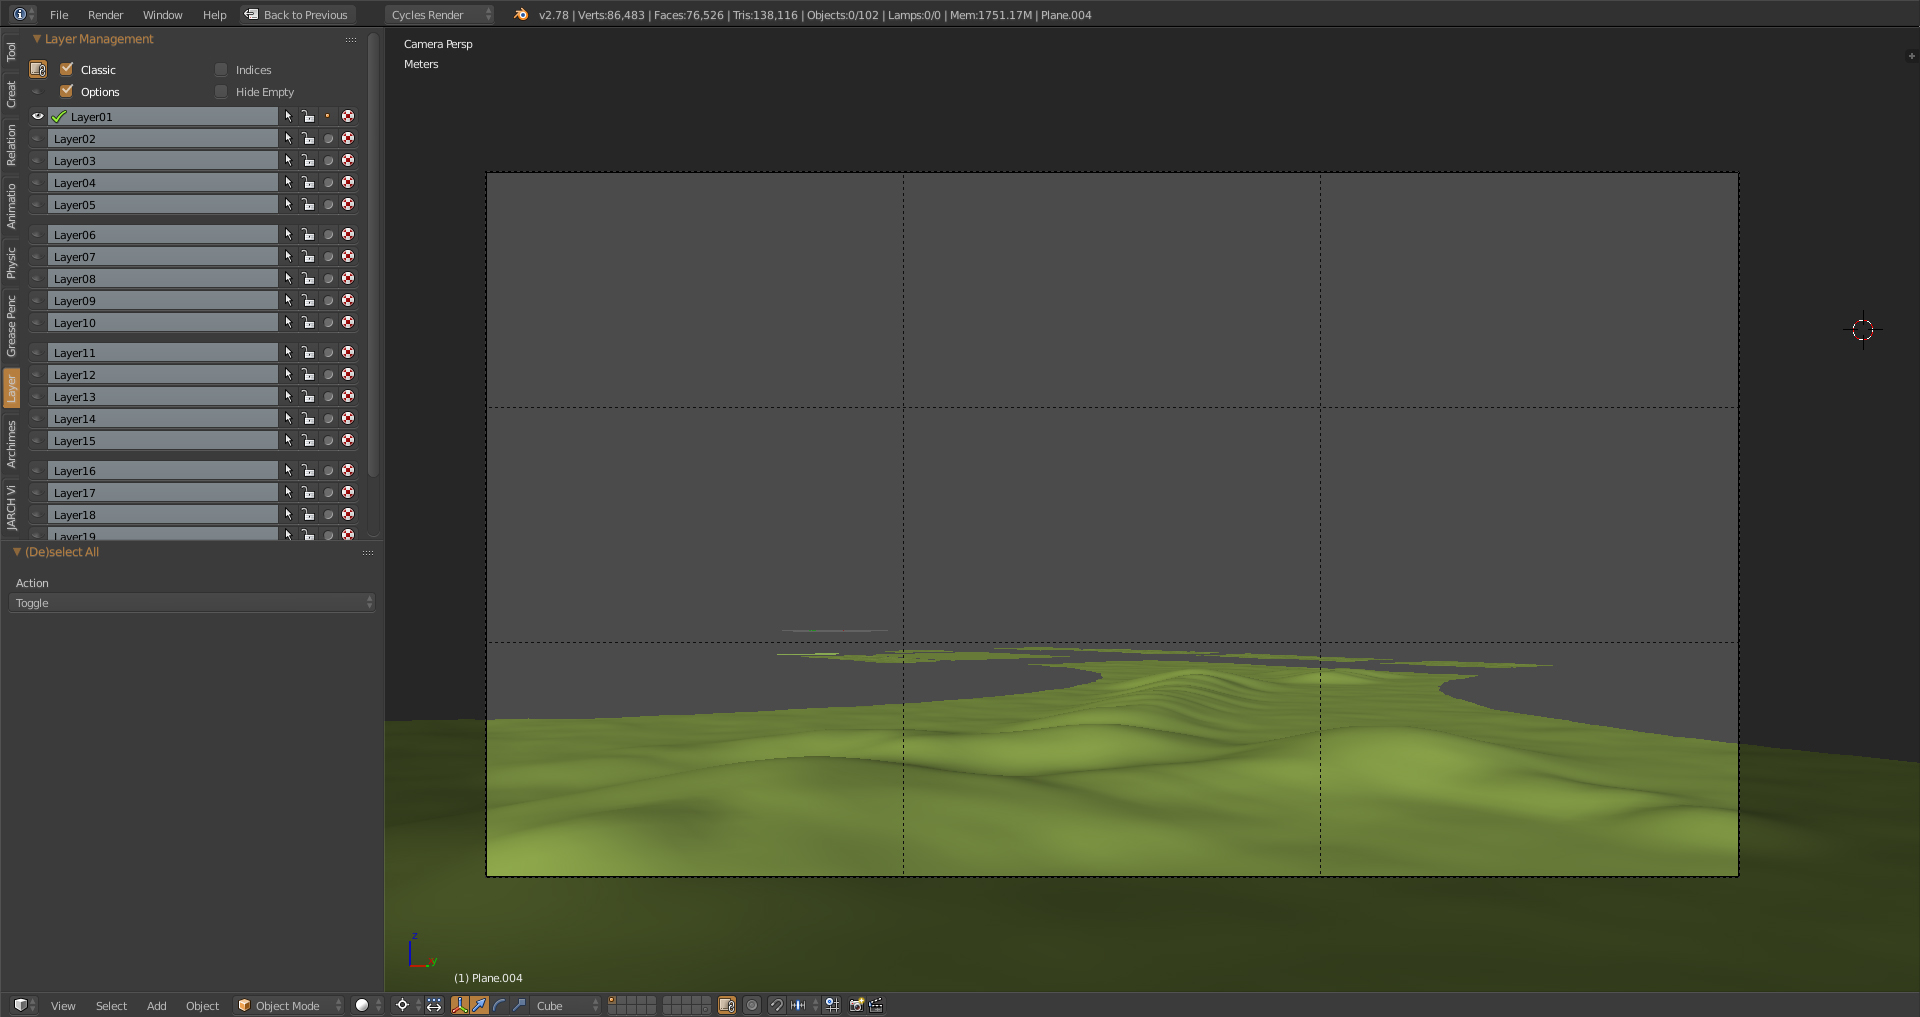
Once the model was in the scene, the next step was to organize it into layers. For this task, we utilized the Layer Management addon. By default, this addon is disabled in Blender, but it can be enabled in the User Preferences window. We highly recommend using it for efficient workflow organization.
Subsequently, we set up the camera angle and began focusing on objects within the camera’s view.
Our workflow then involved creating basic materials and adding primary objects, such as trees in the foreground. It’s crucial to incorporate all major objects into the scene initially to ensure proper composition, while finer details can be addressed later to maintain simplicity in the workflow.
Plants
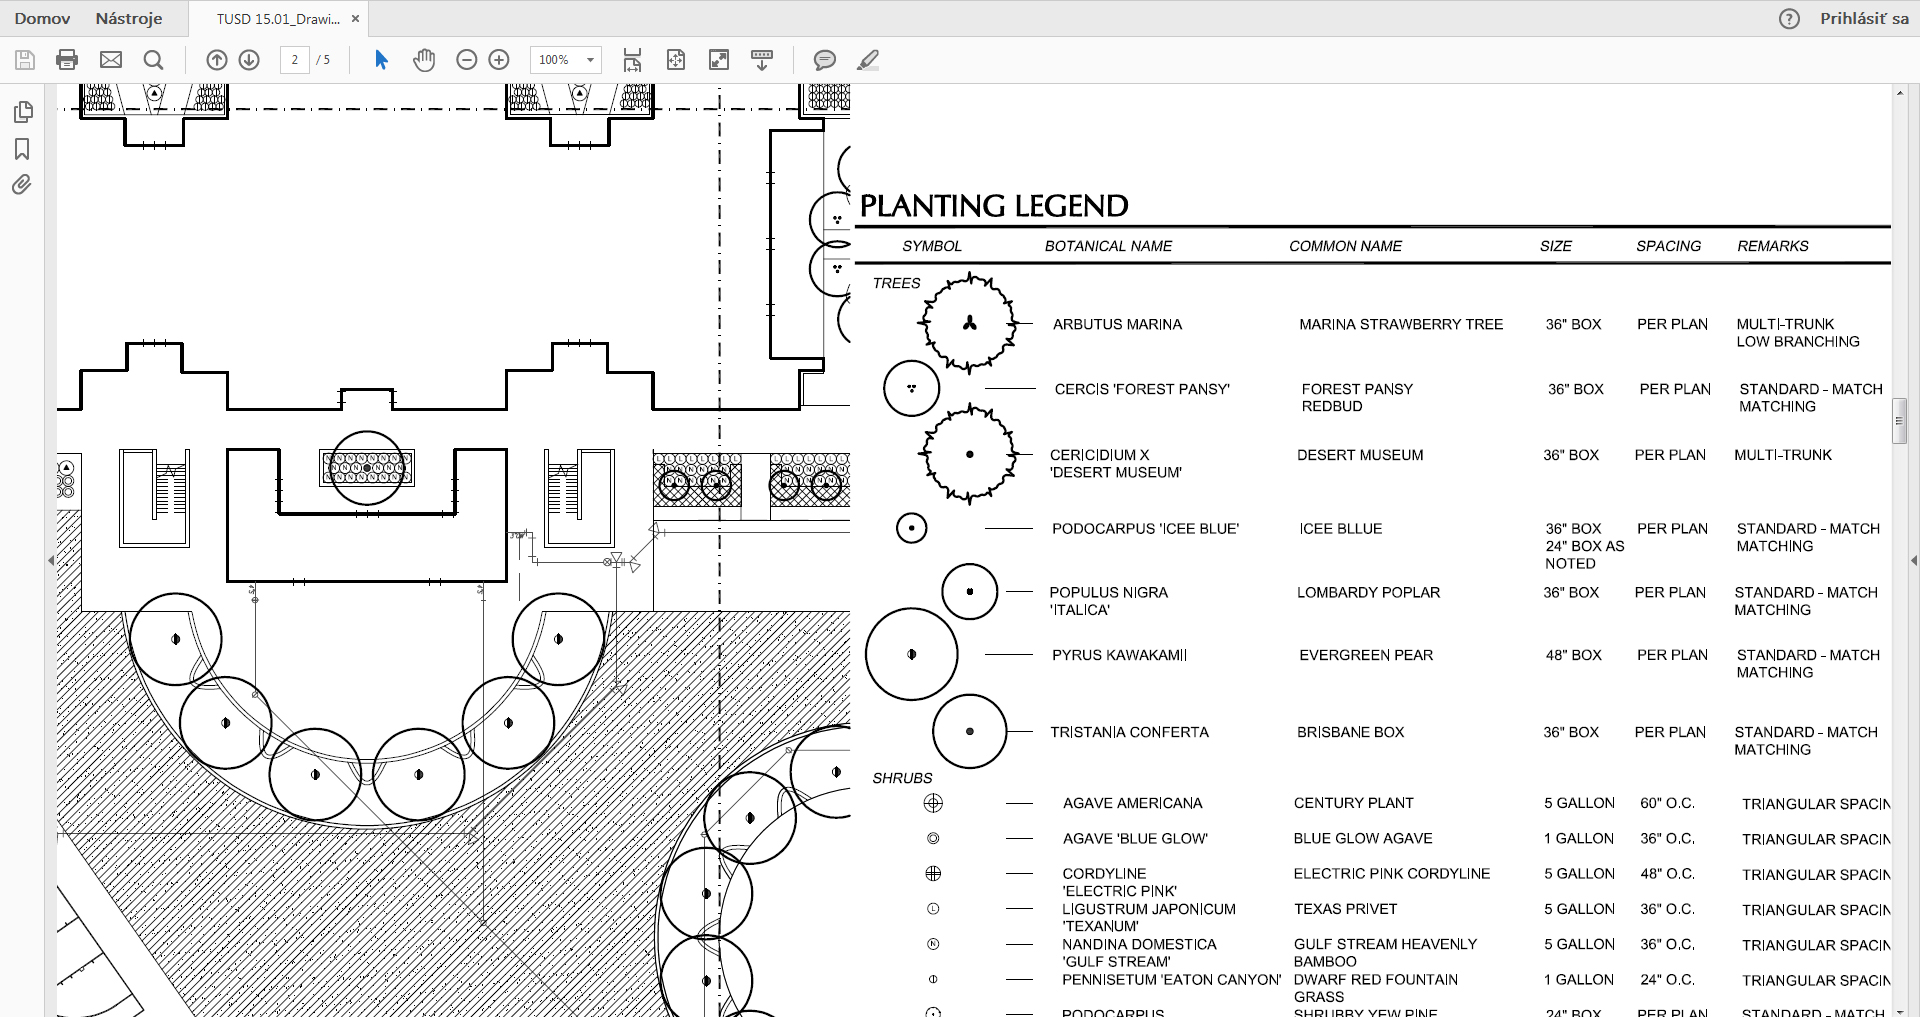
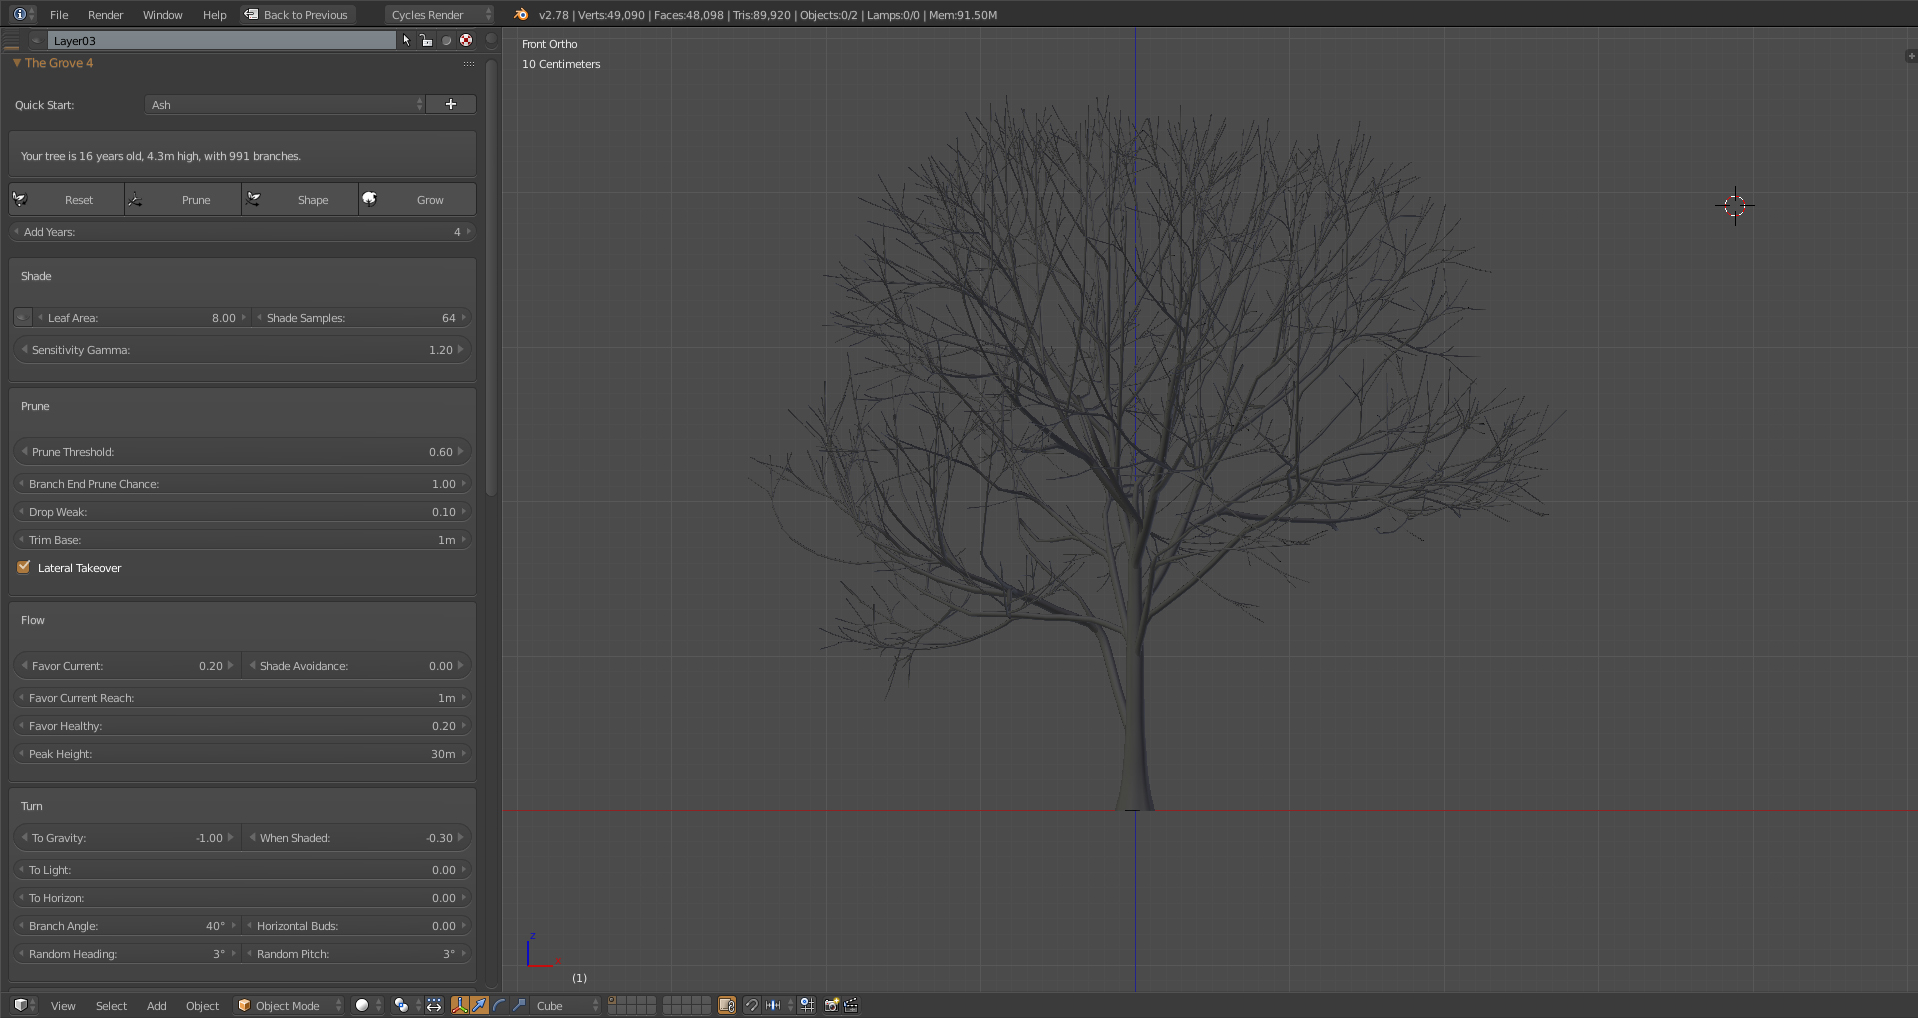
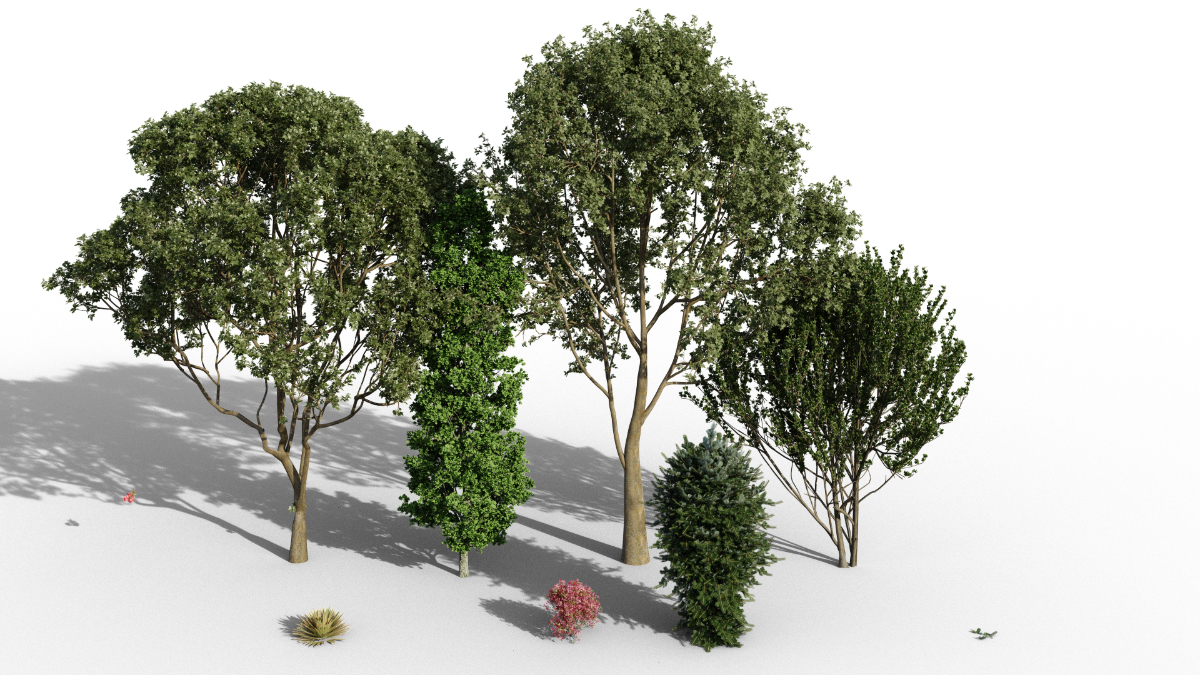
The client provided a detailed placement plan specifying the types of greenery required for various areas. While this was helpful in guiding our work, it also meant that we had to either create or acquire exact models of the requested trees and shrubs. In cases where the required tree model was not readily available for purchase, we turned to the Grove addon. This tool proved invaluable for rapidly generating greenery. Its straightforward functionality allows users to select the desired tree type, click a few times on the “grow” button, and instantly obtain results. Moreover, Grove offers extensive settings for customizing nearly every aspect of the tree, from roots to leaves. One notable advantage is that the leaves are not integrated into the geometry but are instead distributed as a particle system. This feature enables flexibility in adjusting leaf type, quantity, and size, contributing to the creation of realistic scenes. The inclusion of lifelike vegetation is essential for enhancing the realism of exterior scenes and ensuring that visualizations accurately represent the final outcome.
When working with scenes containing numerous high-polygon models, we prioritize linking objects from external files rather than appending them directly into the scene. This approach helps to maintain a manageable file size, typically aiming to keep scenes between 150 to 200 megabytes. By keeping the main file lightweight, the scene remains responsive to commands, ensuring efficient workflow. Additionally, utilizing linked objects offers several benefits, particularly for collaborative work and large-scale projects such as this one, which comprises multiple scenes stored in separate .blend files. Instead of modifying individual objects in each scene separately, changes can be made once in the original file, streamlining the editing process across all scenes.
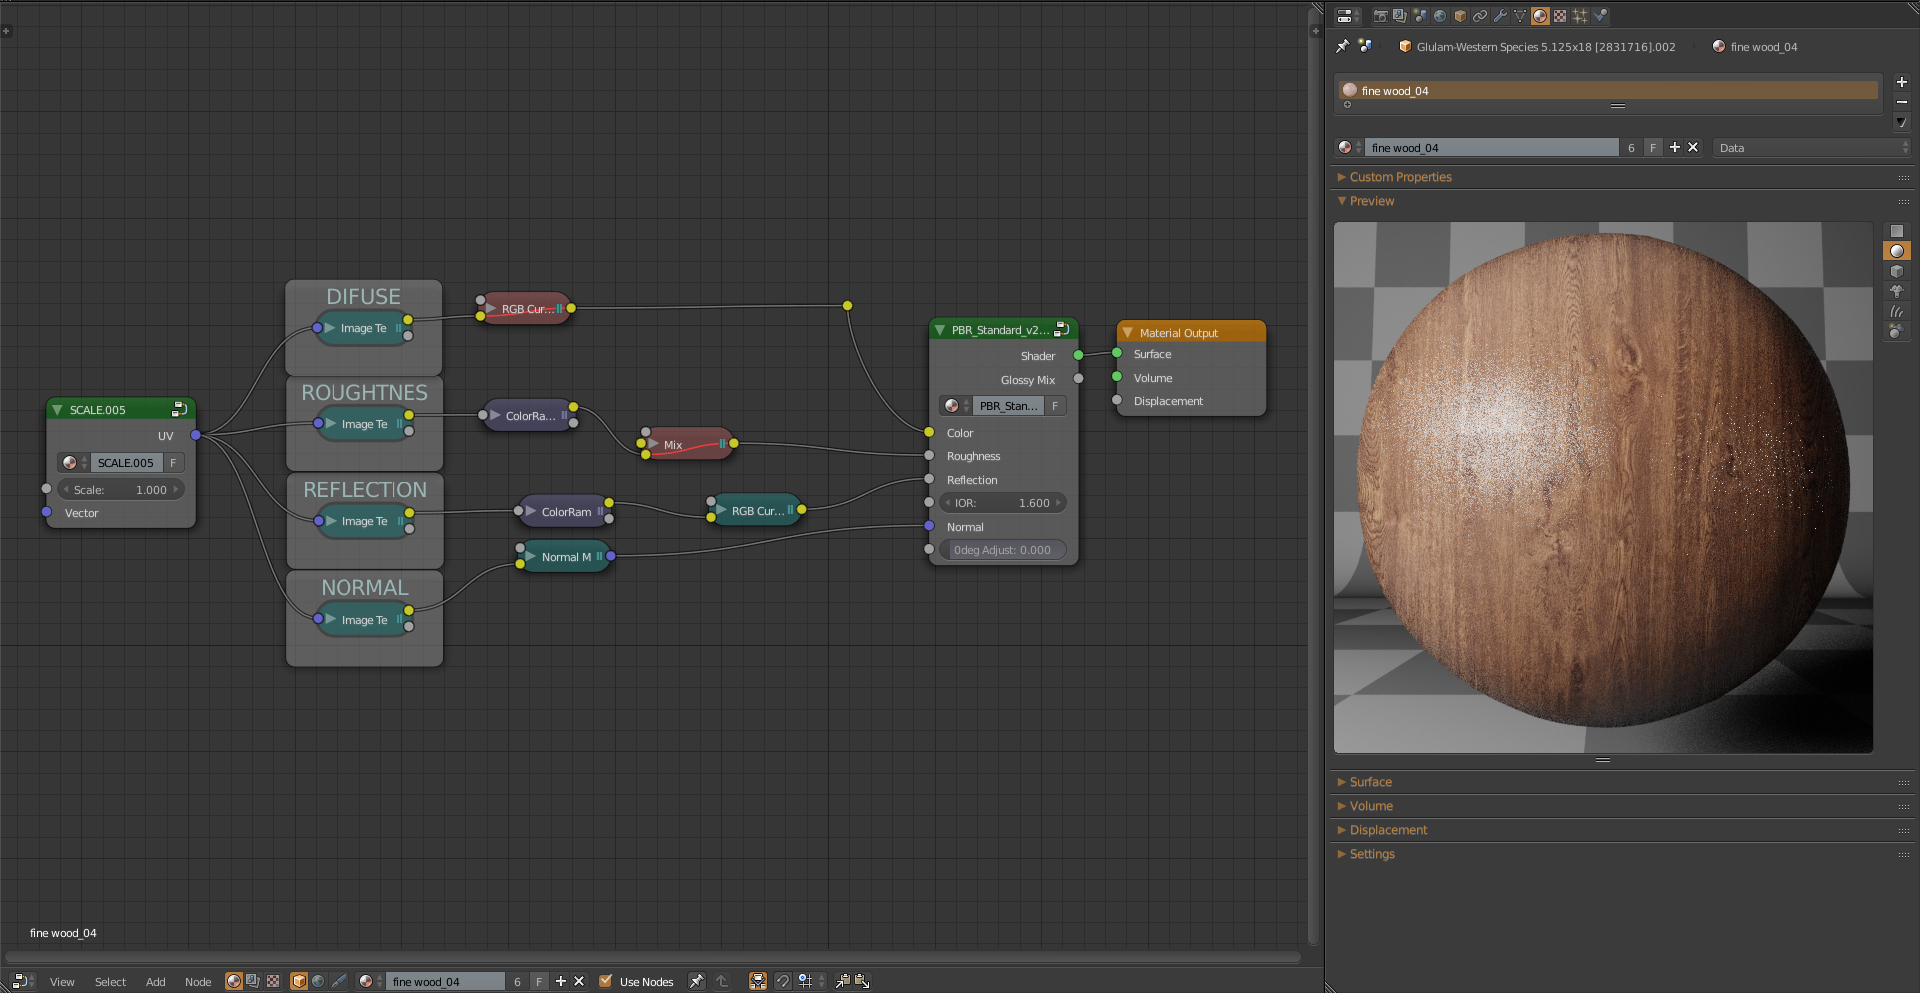
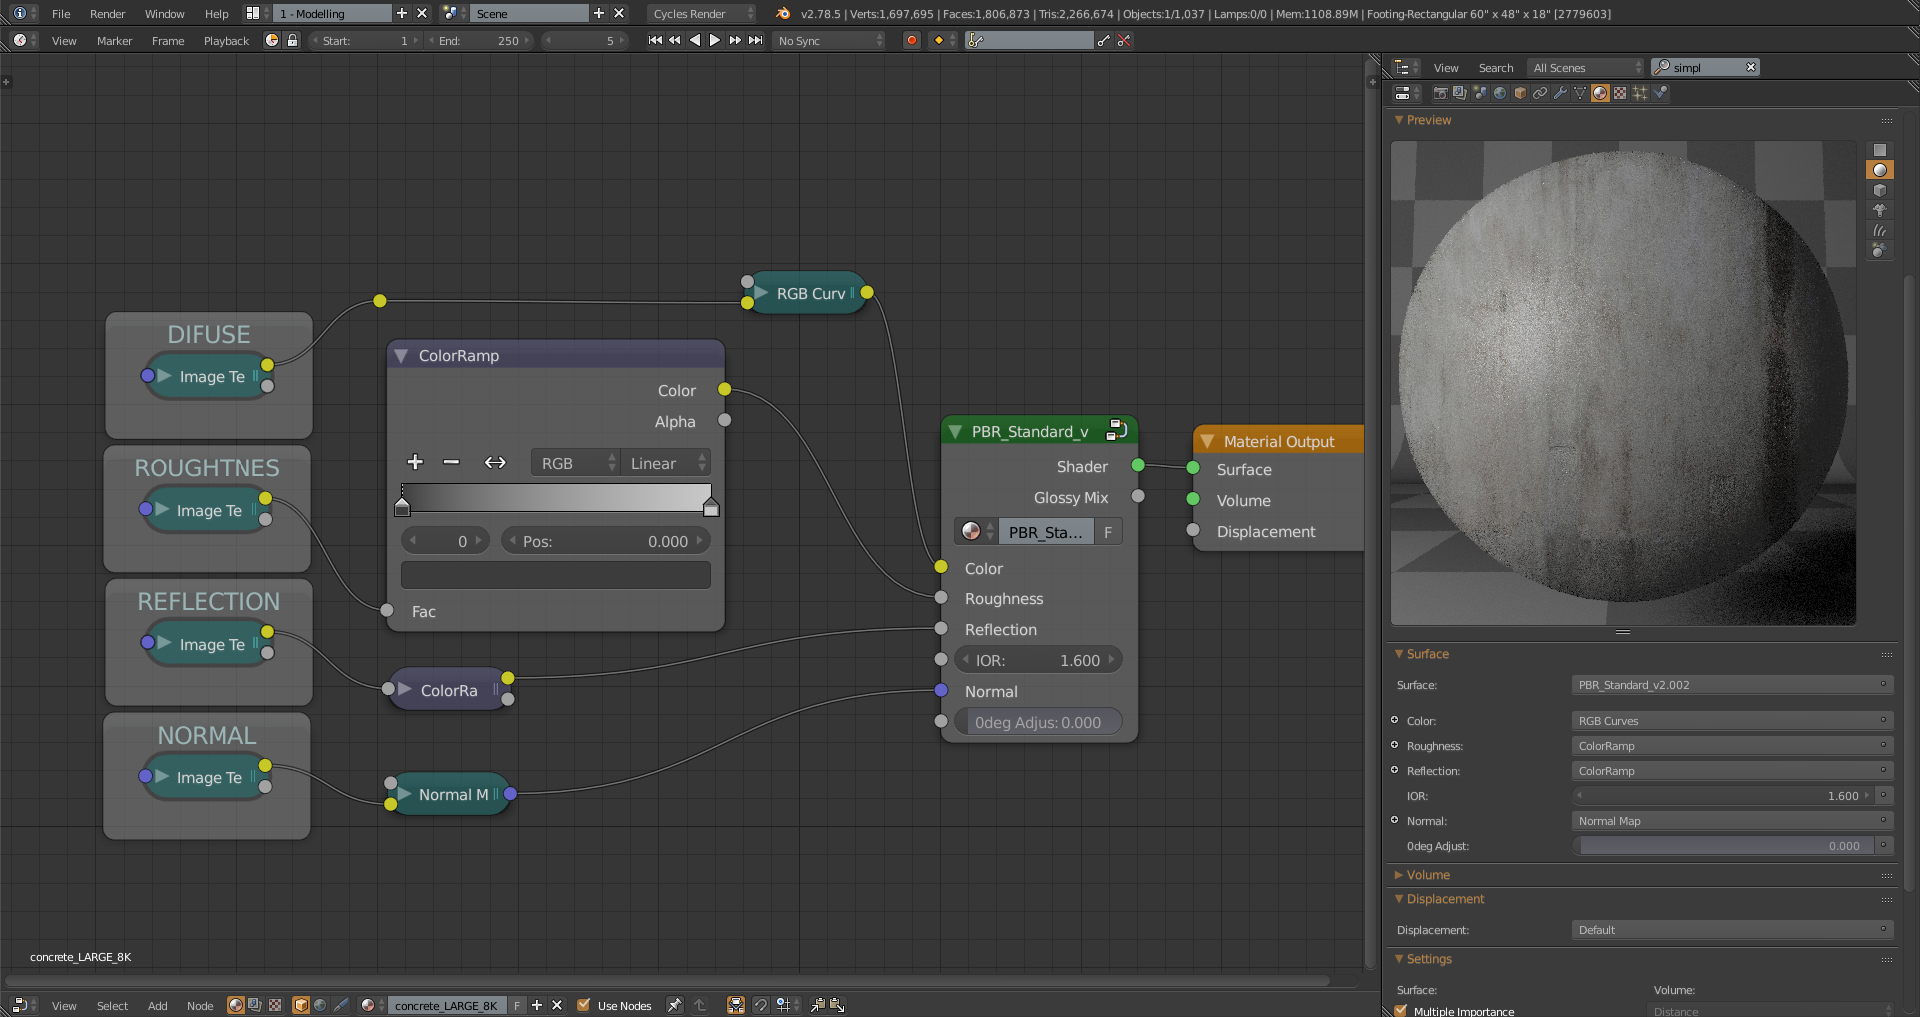
Materials
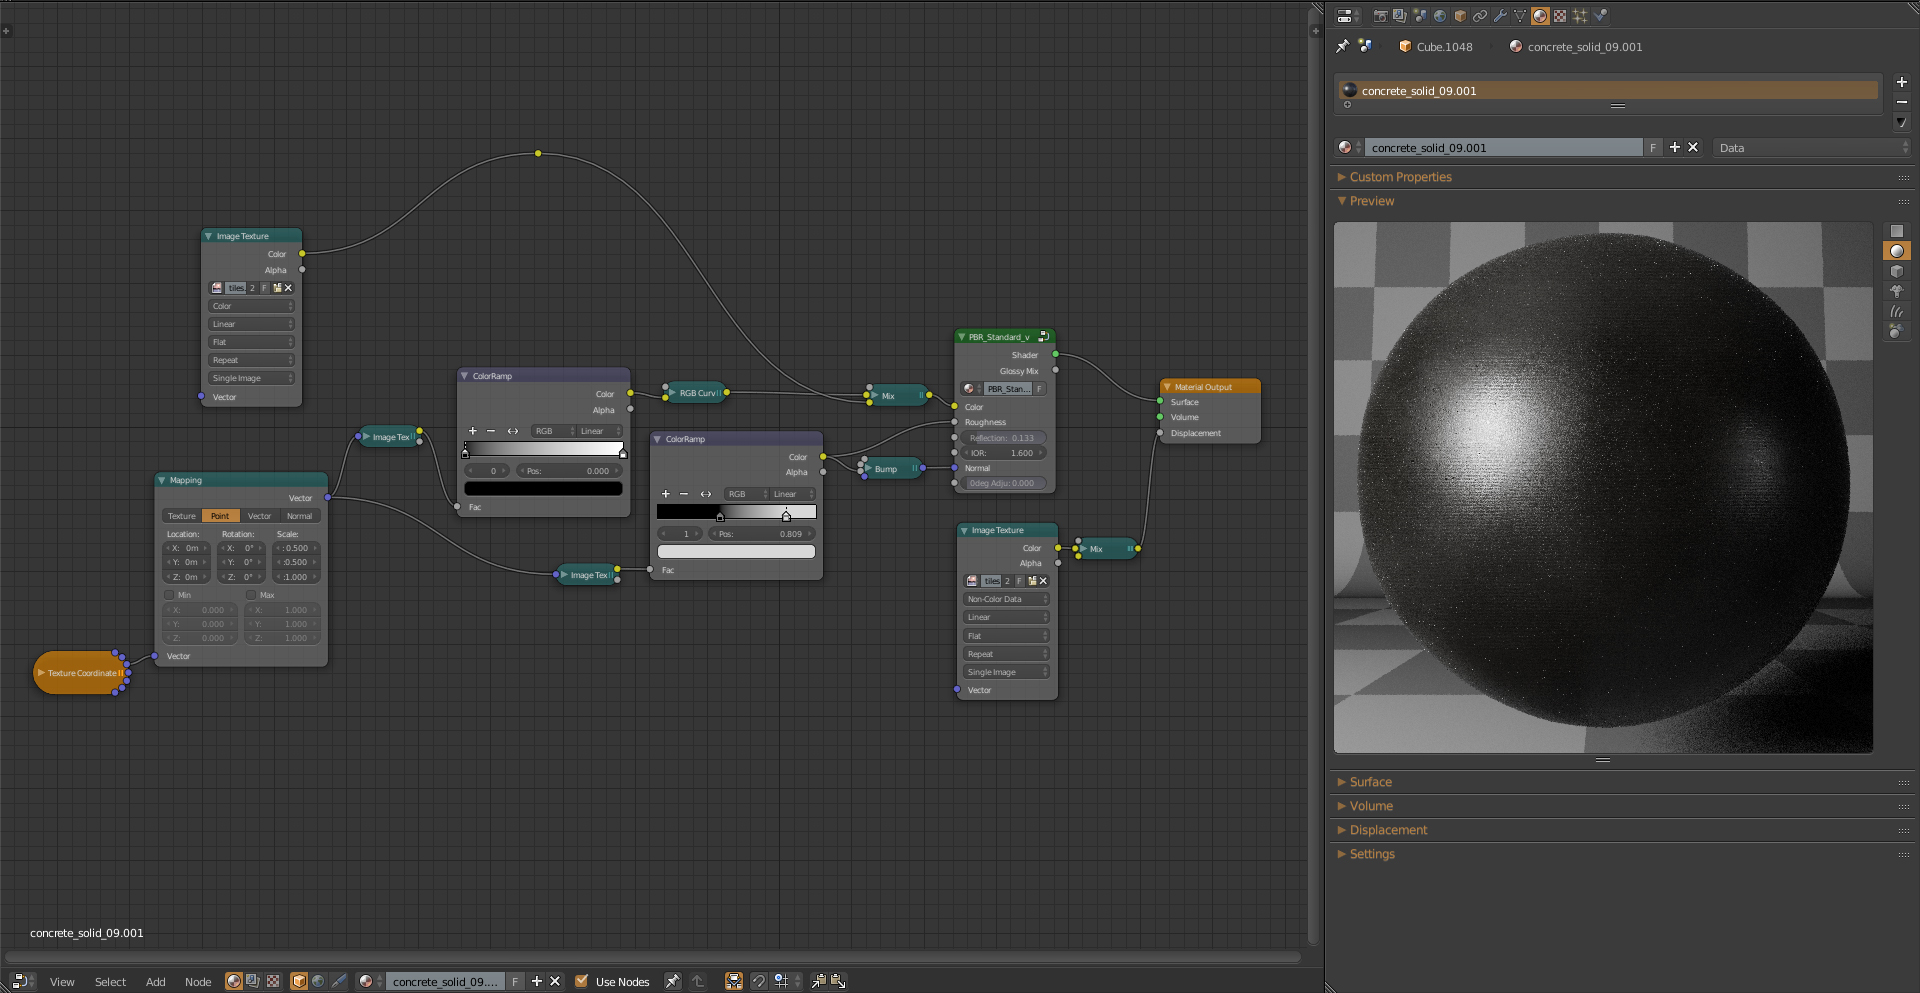
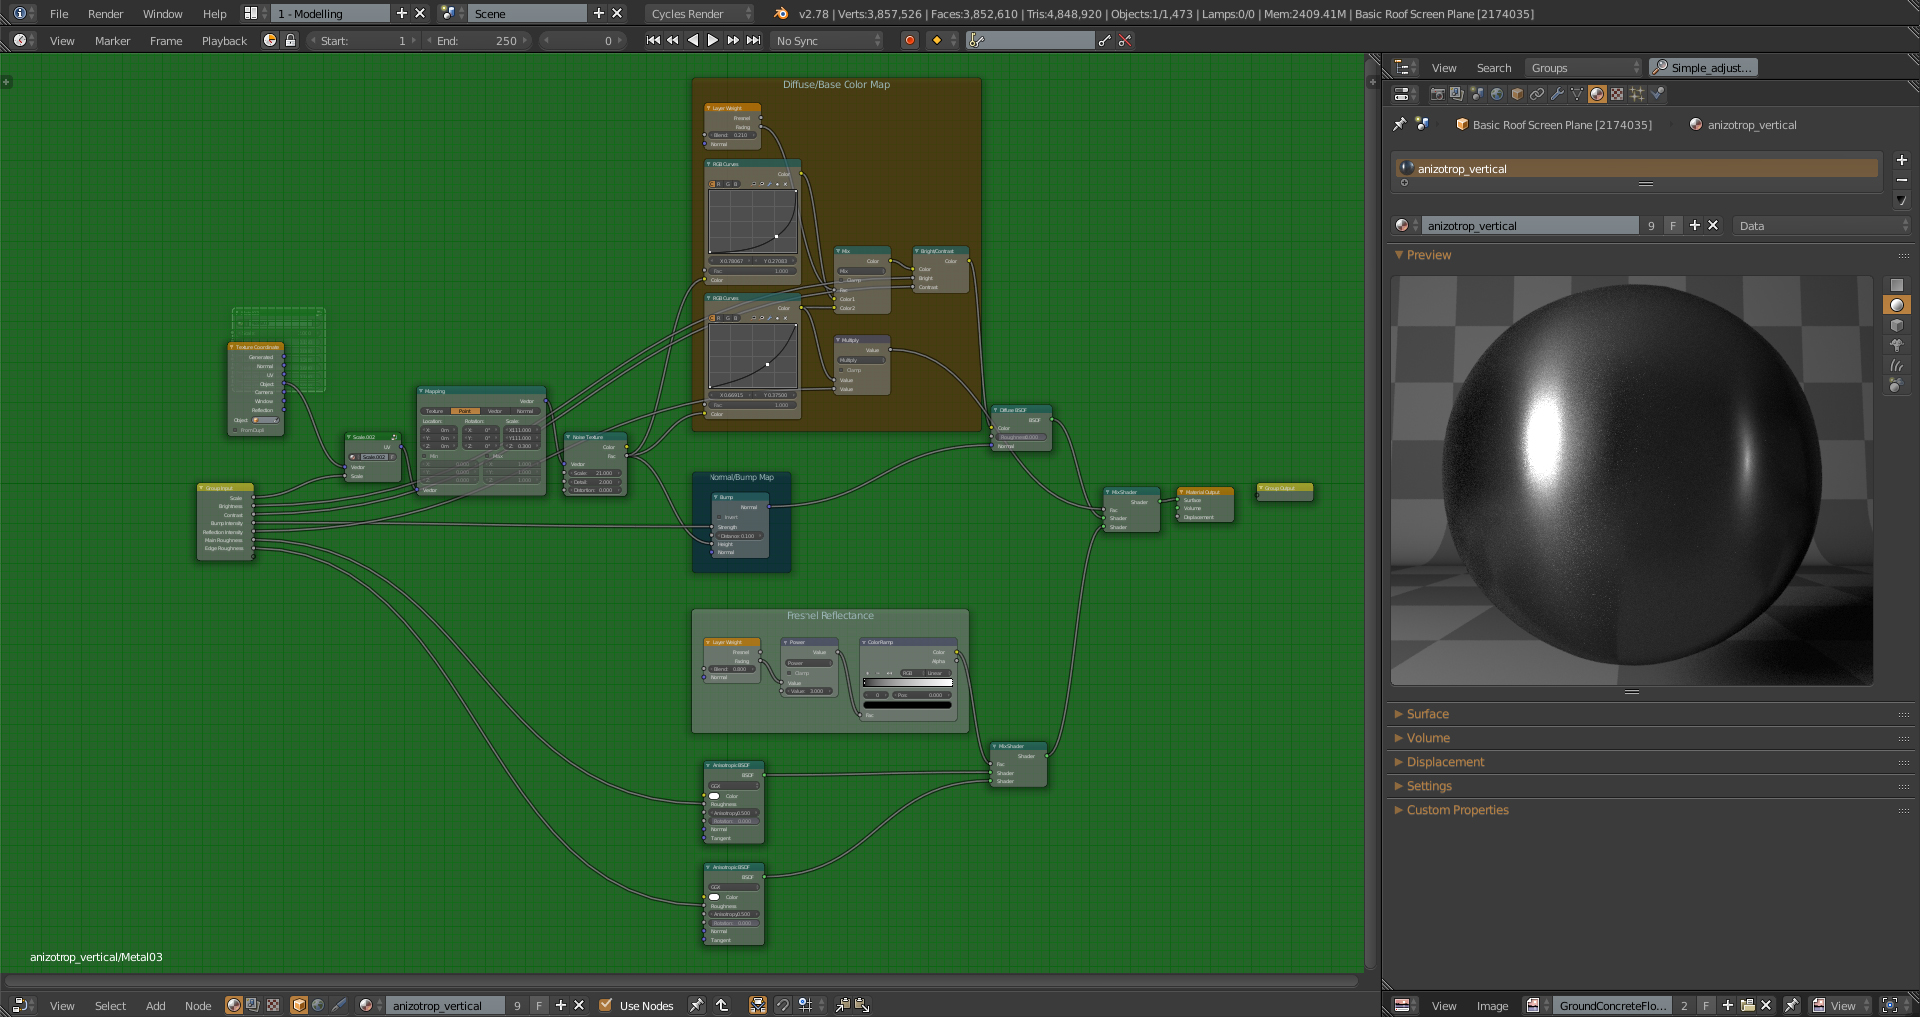
The materials we utilized in Blender predominantly comprised the PBR (Physically Based Rendering) node group by BlenderBRIT. This node-based approach to material creation enabled us to fine-tune the results by connecting PBR textures and modifying them using RGB nodes, Color ramps, or Hue and Saturation nodes.
Lawn
To begin, we established the groundwork – the terrain from which the grass would sprout. We initiated this process with a simple plane, which we then molded to form the terrain.
Once the ground modeling was completed, the next crucial step was unwrapping it. We employed the “Unwrap from view” function, particularly from a top view perspective. A basic texture was applied to the base, as it would later be overlaid with grass.
For the grass, we implemented a particle system. Tufts of grass were randomly distributed across the surface, and various types of grass stalks were combined to enhance the scene’s realism.
Creating a realistic grass field necessitates the use of large number of particles. However, a higher particle count can lead to decreased software responsiveness and longer rendering times. In most cases, it’s imperative to display particles only within the camera’s visible area. To achieve this, we optimized the distribution of particles using vertex groups and weight paint.


Lighting
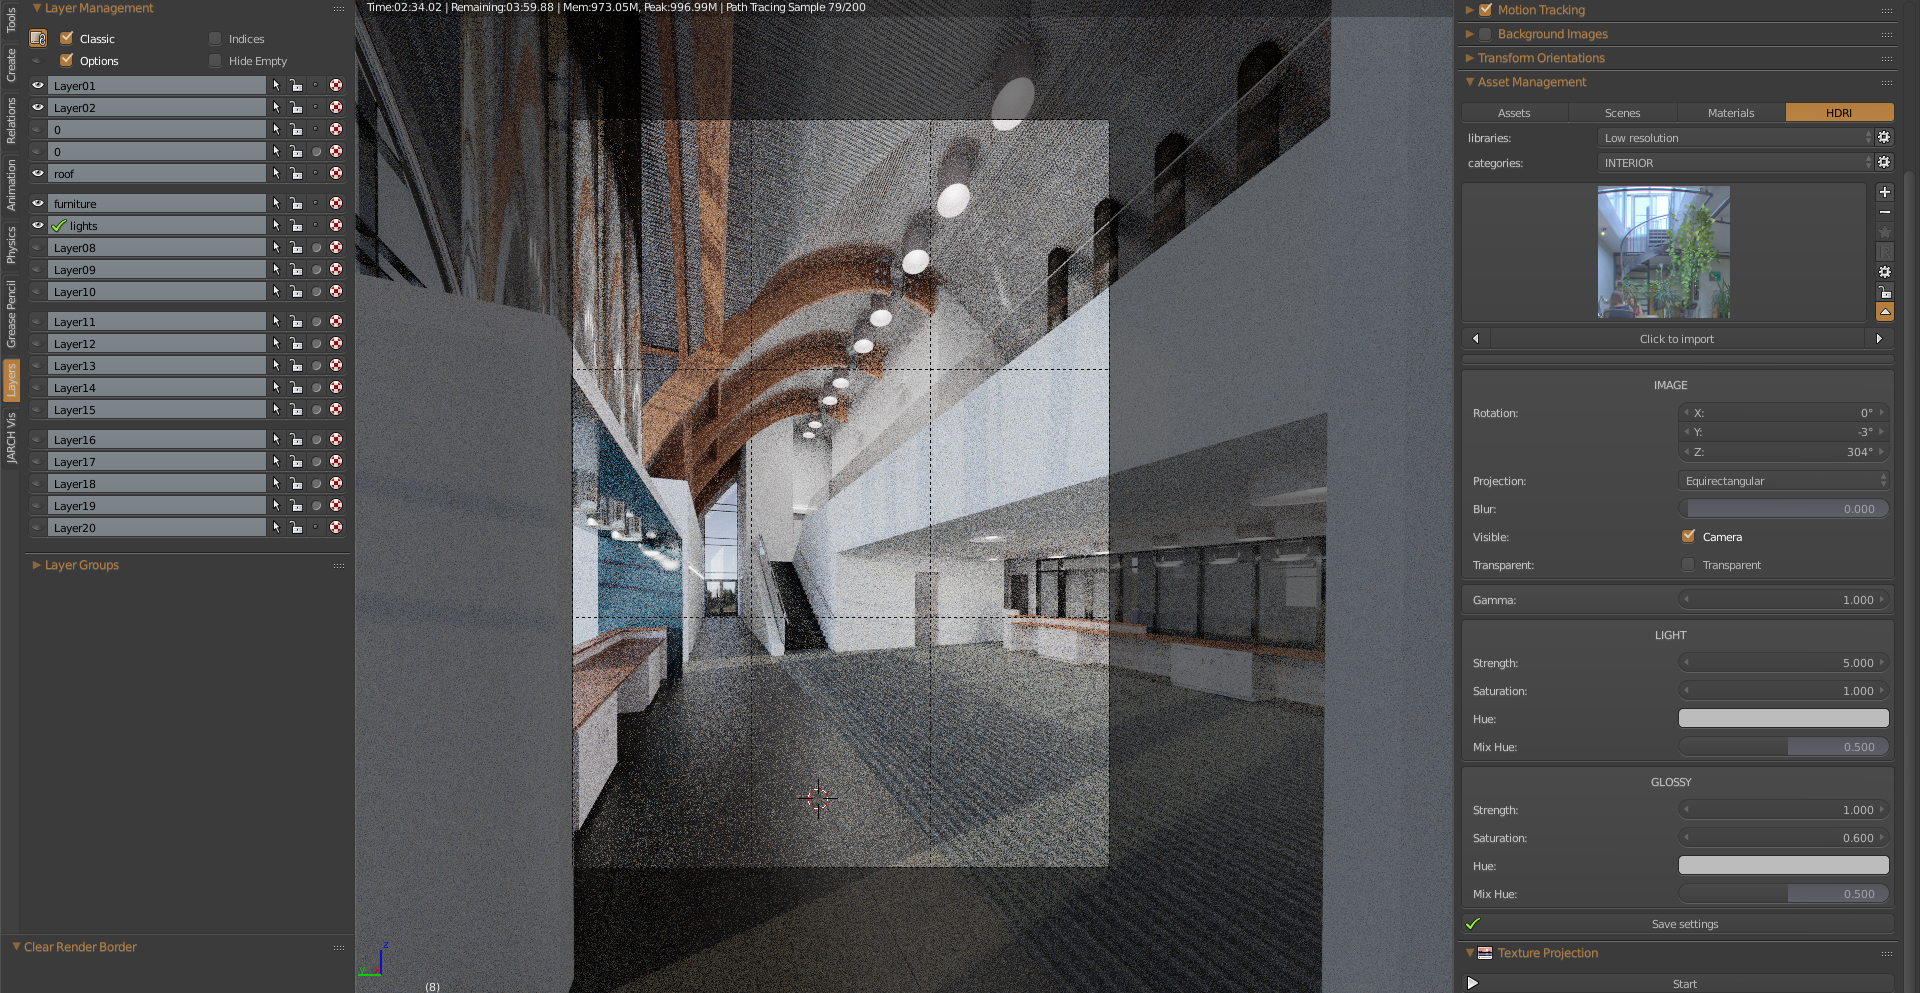
The subsequent step in achieving our desired result involved finding the right illumination for the scene. We experimented with various lighting setups by adjusting HDRI maps. Additionally, we rotated the maps since each HDRI map, along with its positioning, imparts a distinct atmosphere to the scene.
We supplemented the scene with exterior furniture, applied missing materials, and adjusted certain trees to meet the client’s requirements.
Post production

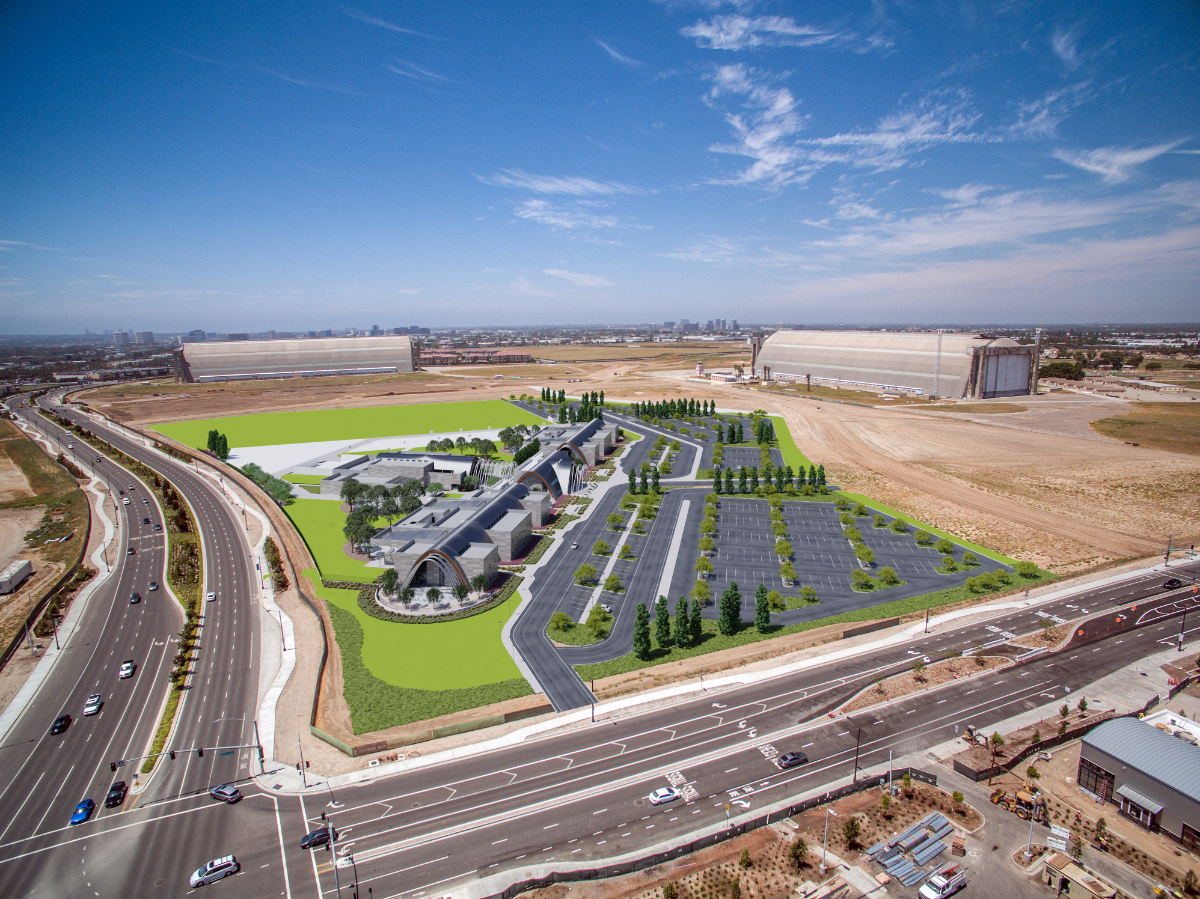
Bird's Eye View
Bird’s-eye view images present a unique set of challenges distinct from classical visualizations. Unlike traditional viewpoints, where close shots of visible areas suffice, aerial perspectives require comprehensive processing of the entire project, necessitating modifications to all shapes and details. This process is inherently more time-consuming and places greater demands on hardware due to the increased number of objects in the scene.
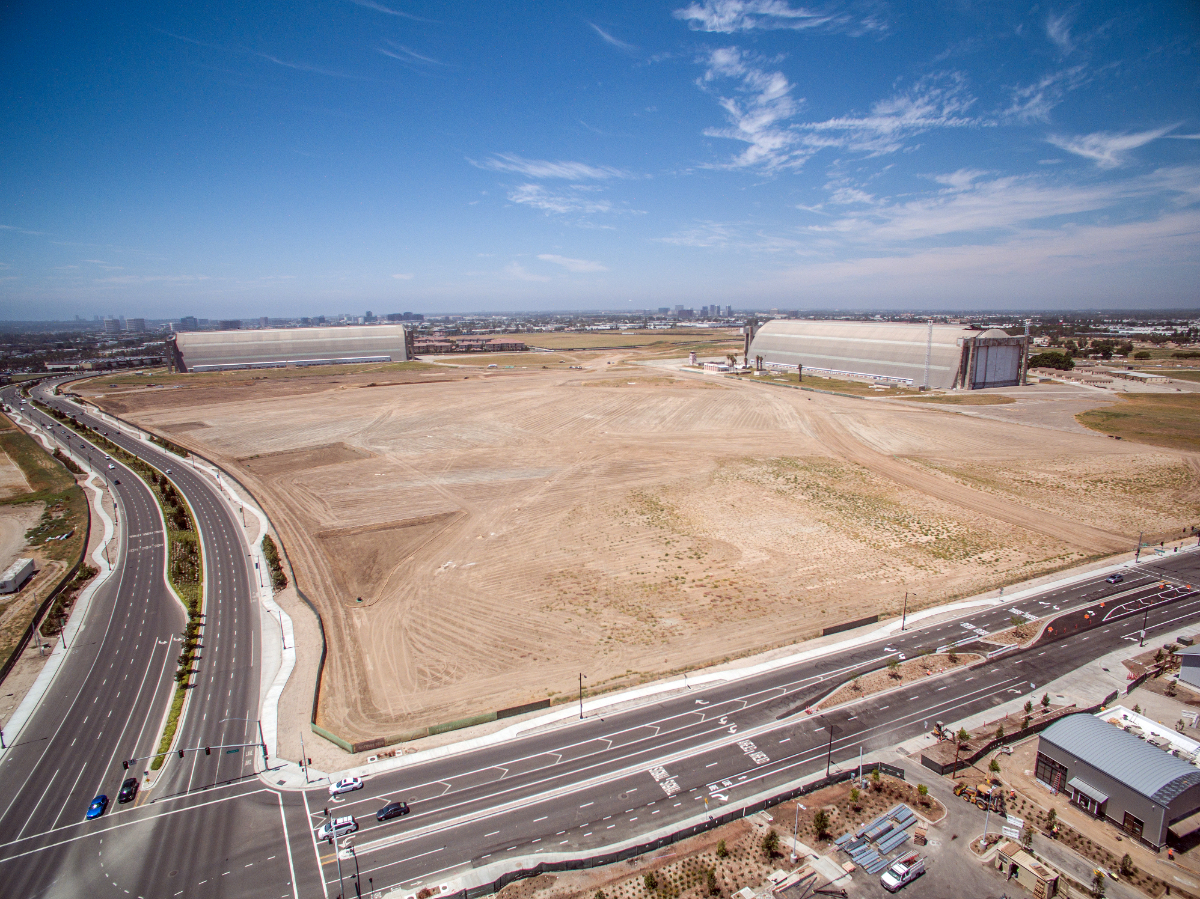
Our work on these images commenced with the client providing a drone photograph. Our objective was to replicate the same angle and height in our render, striving for the utmost realism in the final outcome.
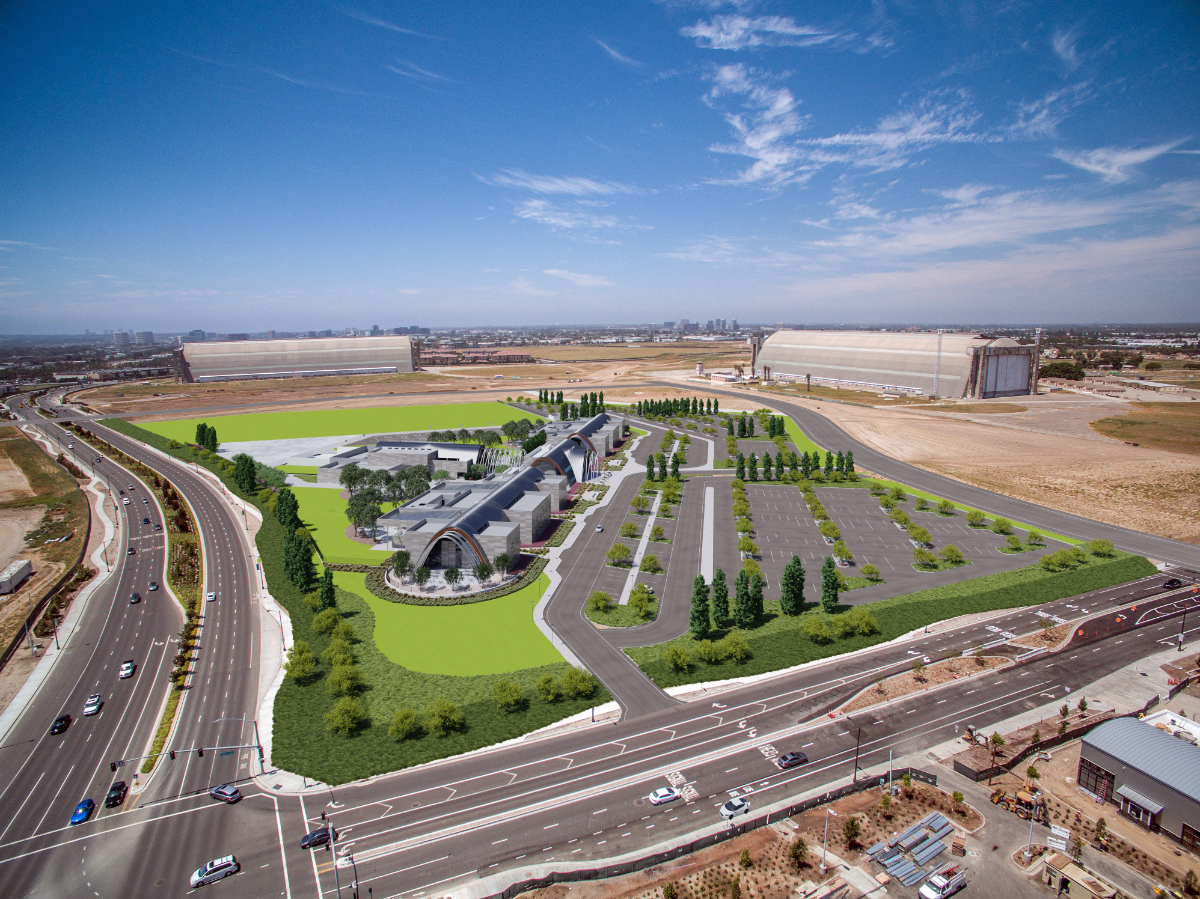
Compositing Onto a Photo
We started by finding out what settings were used by the camera attached to the drone. You can find some of that information on the photo properties. We were most interested in focal length.
The next step is to estimate at what height was the photo taken, how was the drone camera rotated, and so on. This part has taken us a lot of time because we wanted to fit everything exactly in the original photo.
When we had a camera in Blender set up so that the render was appropriate to fit into the photo, it was still necessary to set the light. It had to resemble the lighting conditions that were most alike to a time when the photo was taken. We again tried many HDRI maps, turned them around and we were changing the intensity until we were satisfied with the outcome.
Our prior experience with other images for this project proved invaluable, as much of the groundwork for deploying objects such as trees, grasses, bushes, and cars had already been laid. Nonetheless, there were some additional objects that needed to be incorporated. Consistent with our approach in previous scenes, all objects were added through linking, ensuring that the file remained compact and operations were swiftly executed.
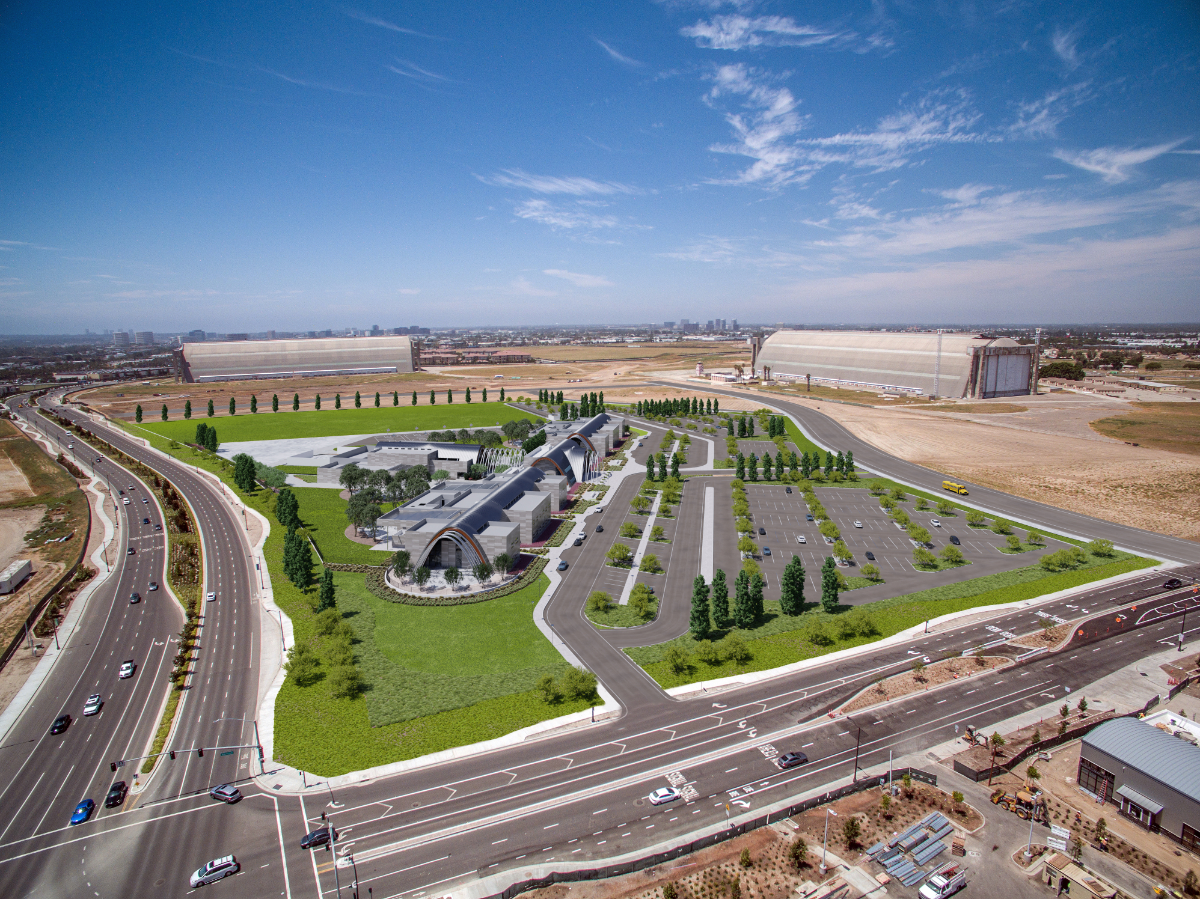
Rendering
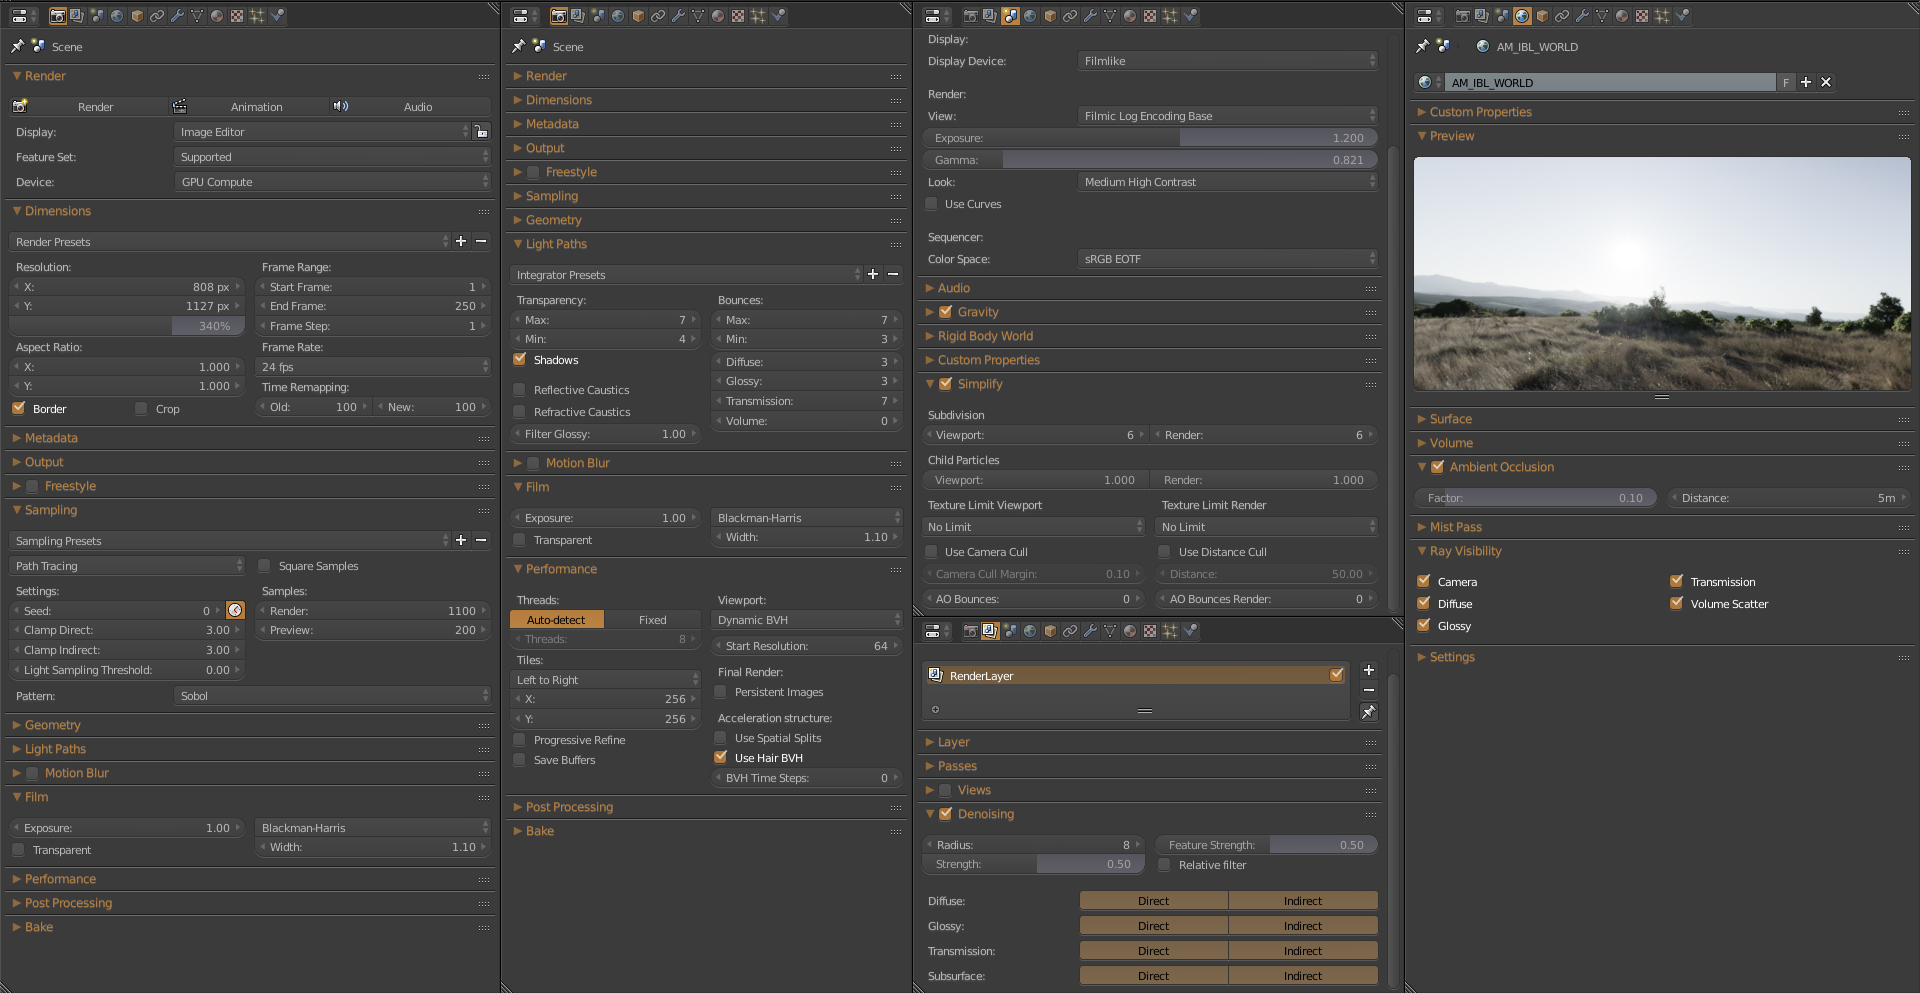
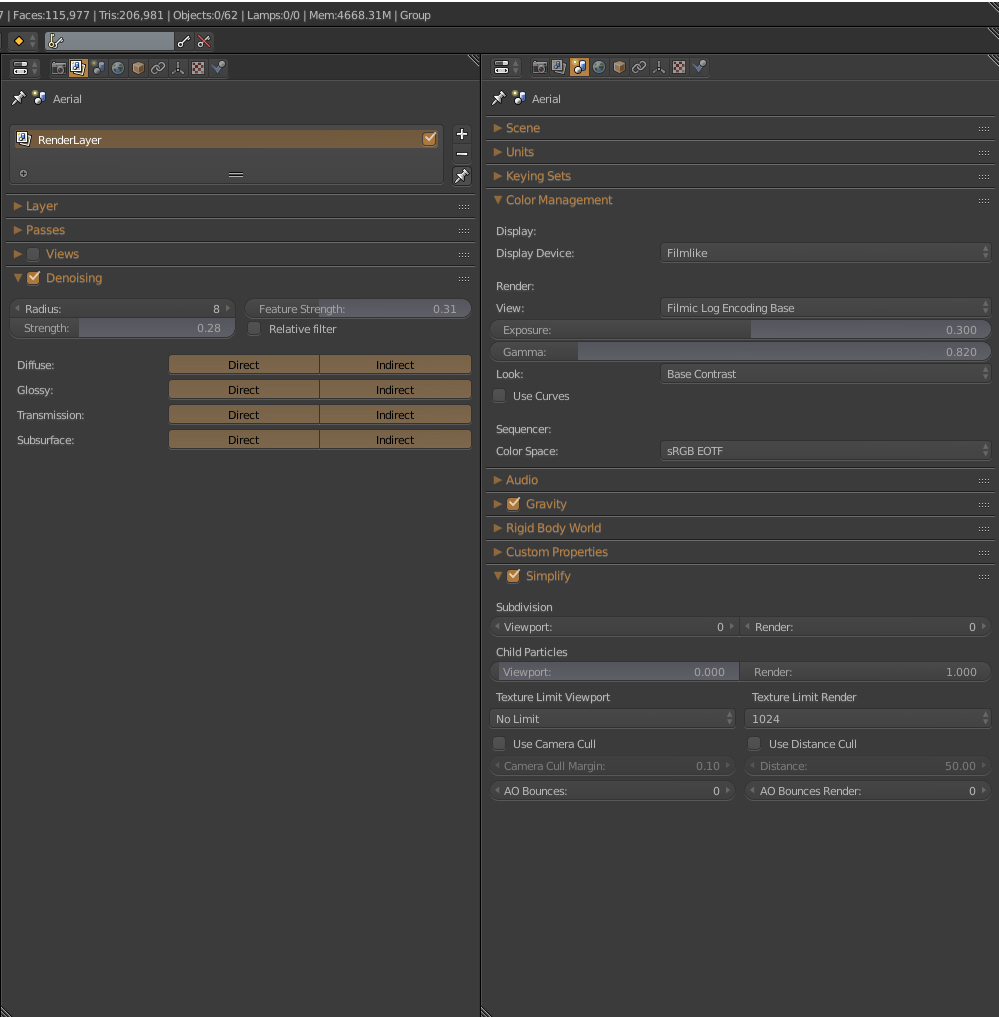
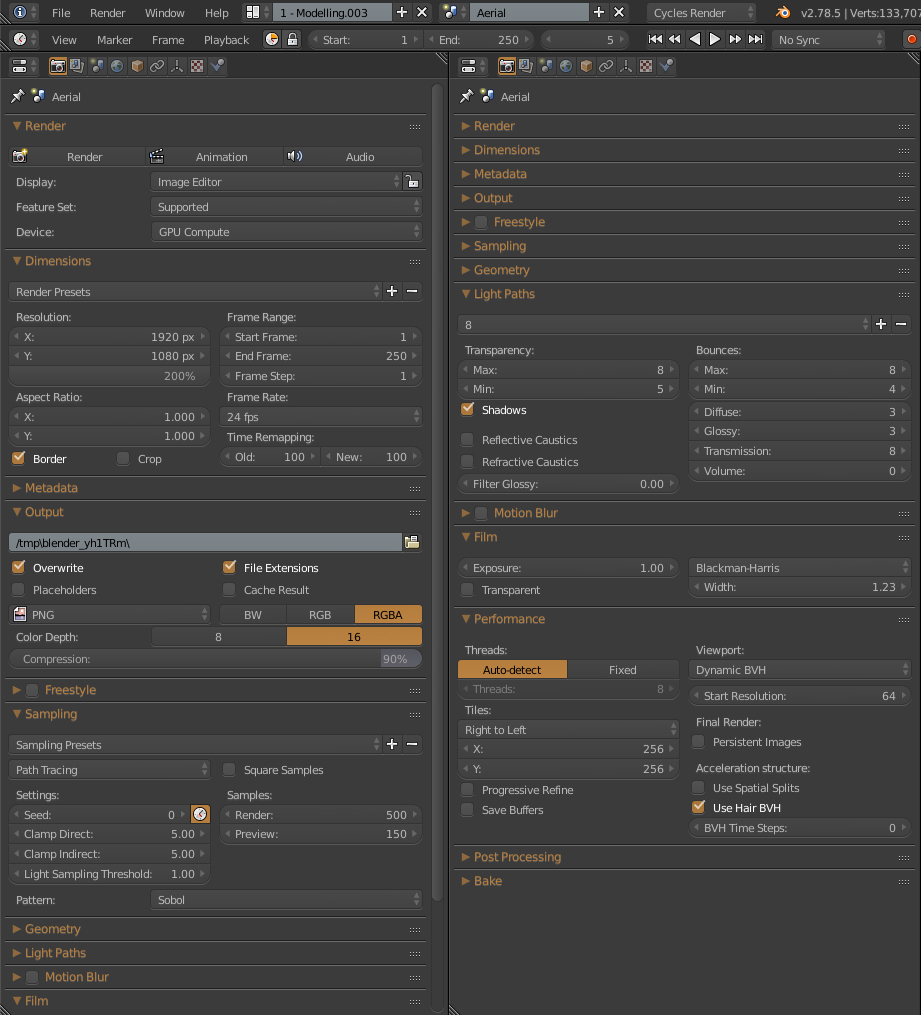
We rendered the scene using the Cycles render engine, harnessing the power of our GPUs. The final image was rendered in 4K resolution and saved as a 16-bit PNG. Utilizing 500 samples along with the denoiser, we achieved a clean render without noise.
In this scene, we experimented with the Denoiser and were impressed by the results, achieving a clean render with only half the usual number of samples. Detailed settings can be found below.
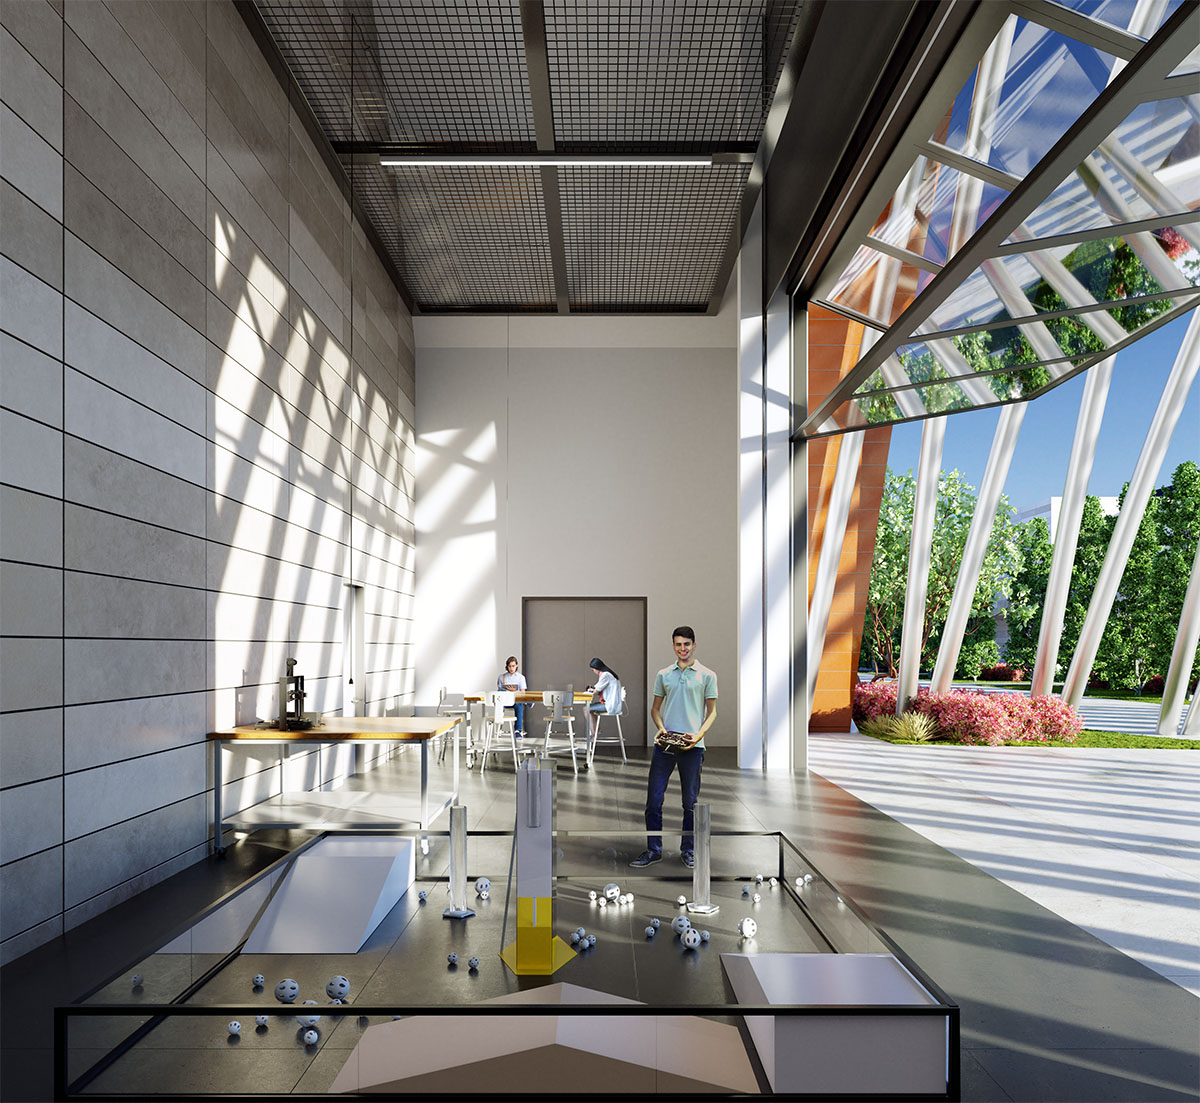
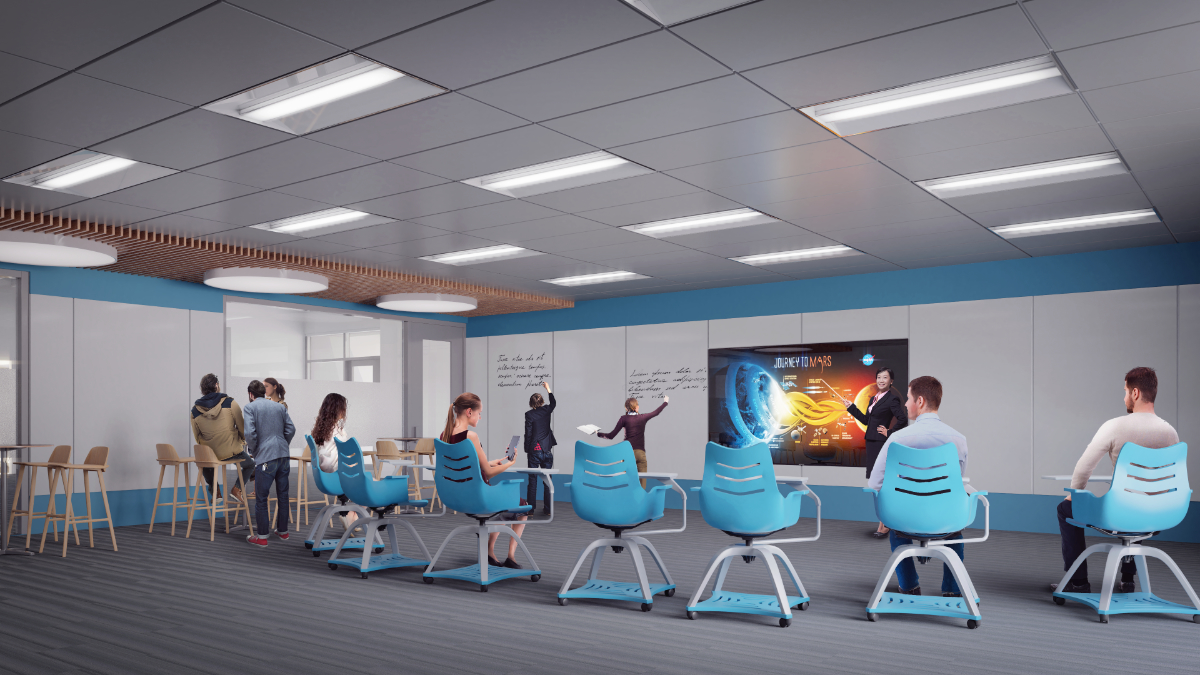
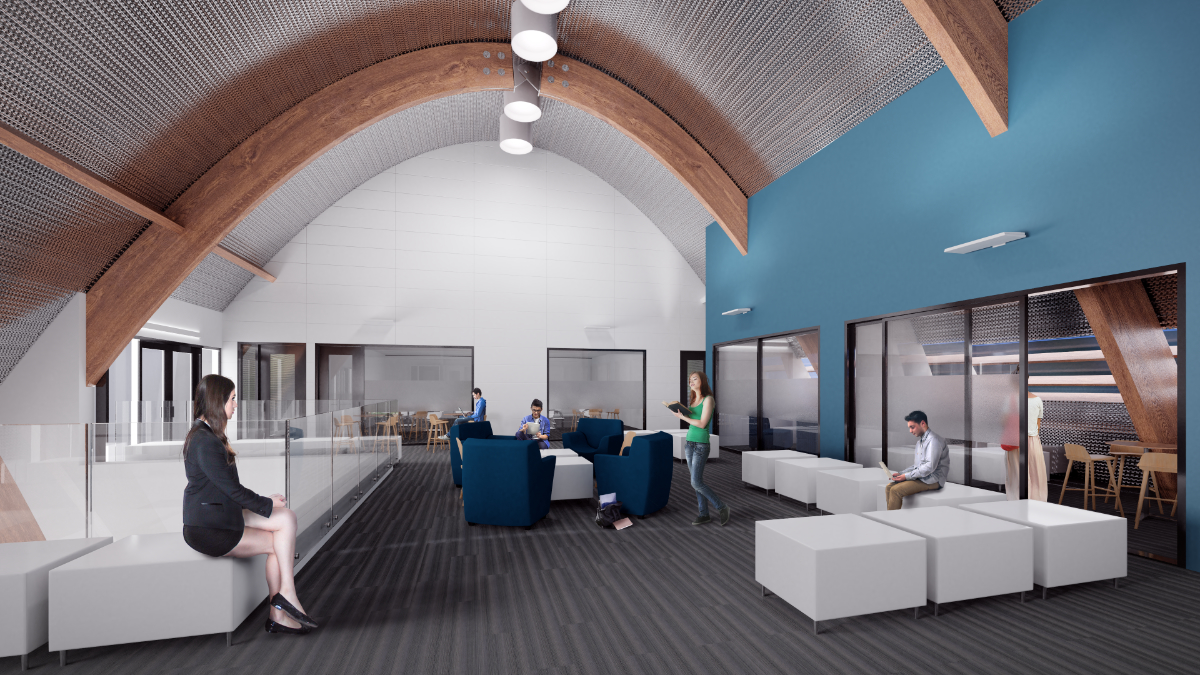
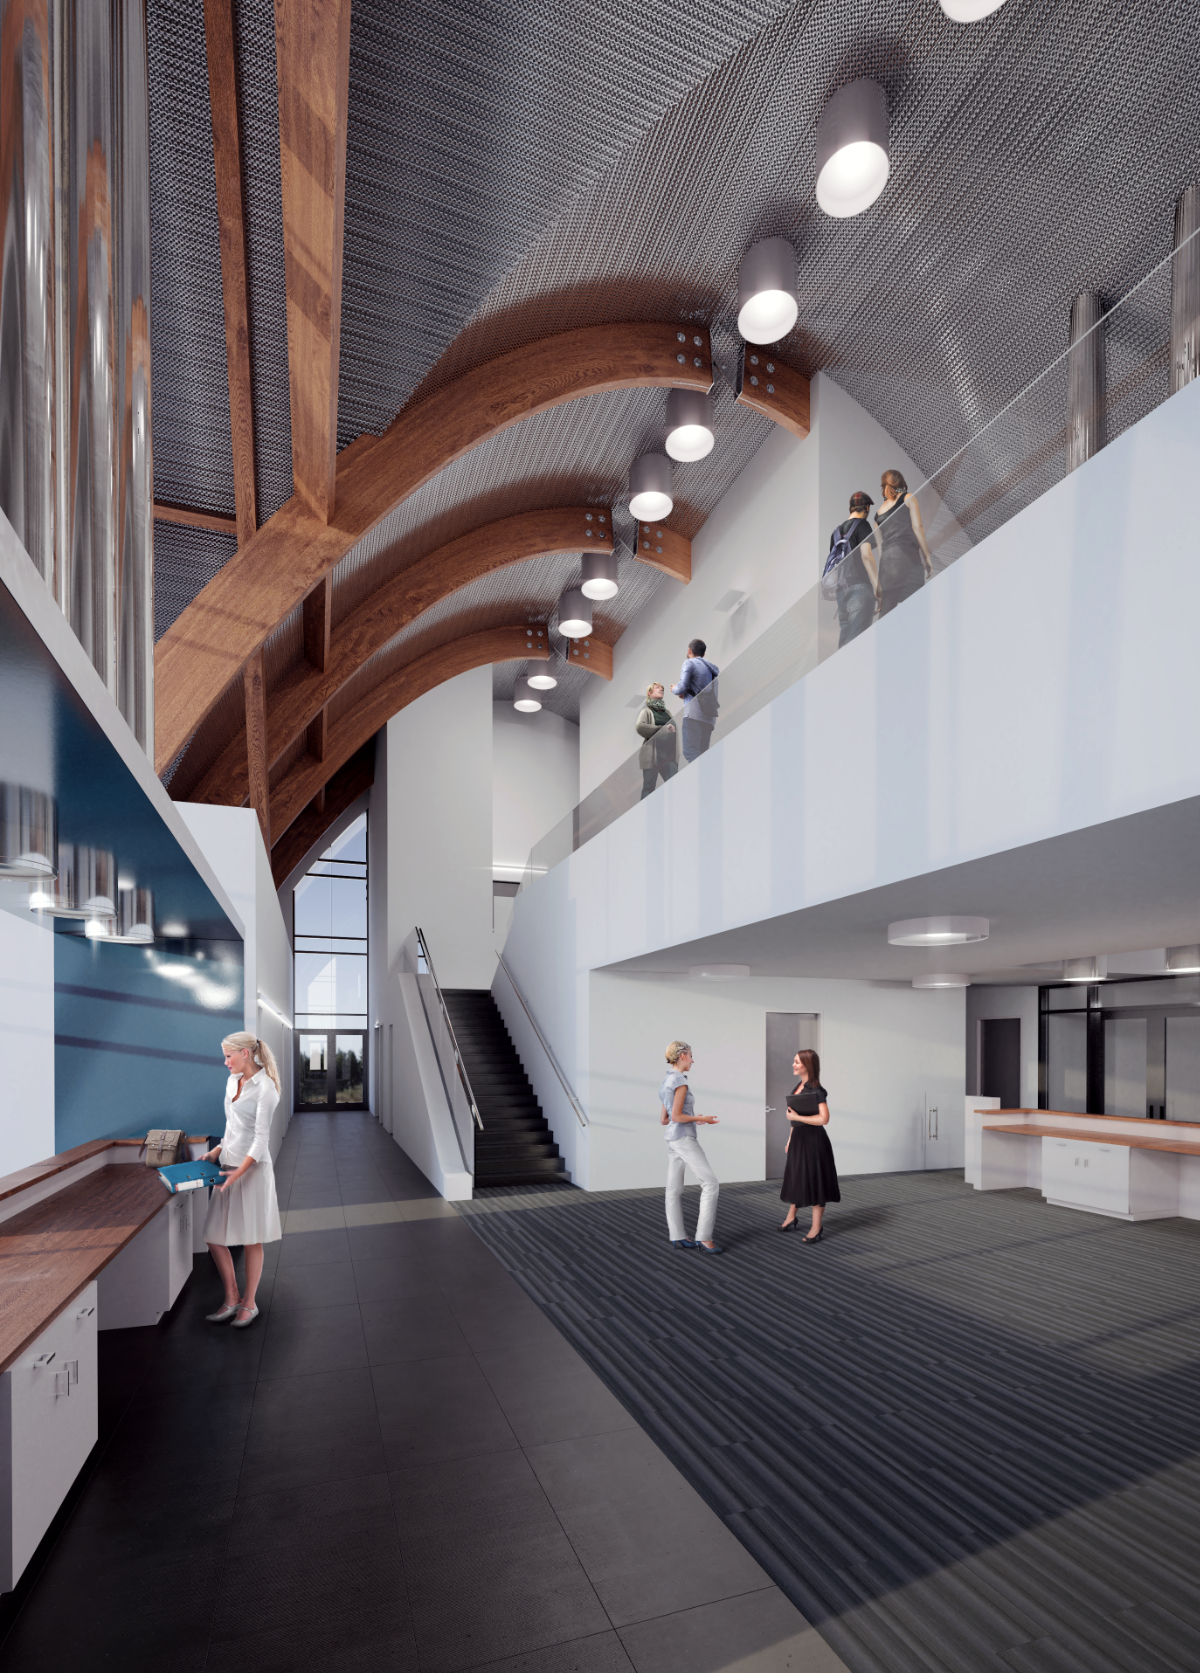
Interior Renders
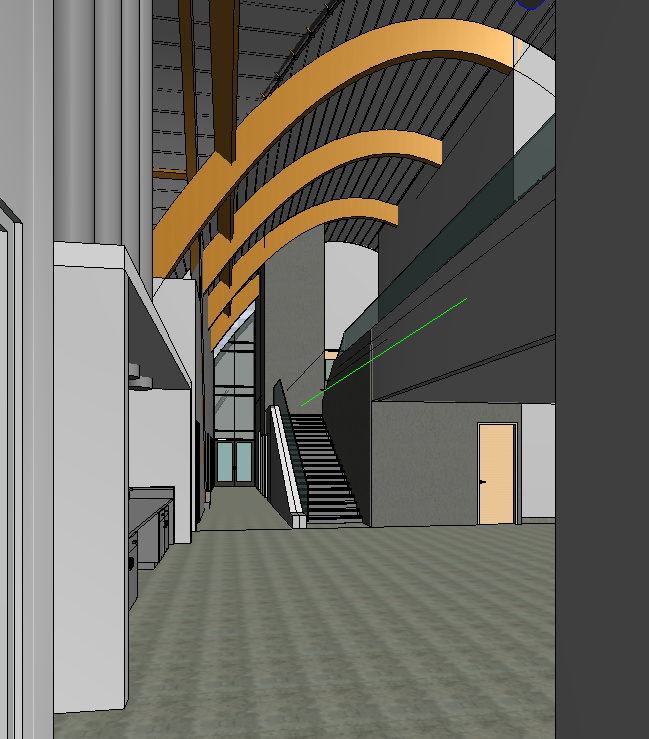
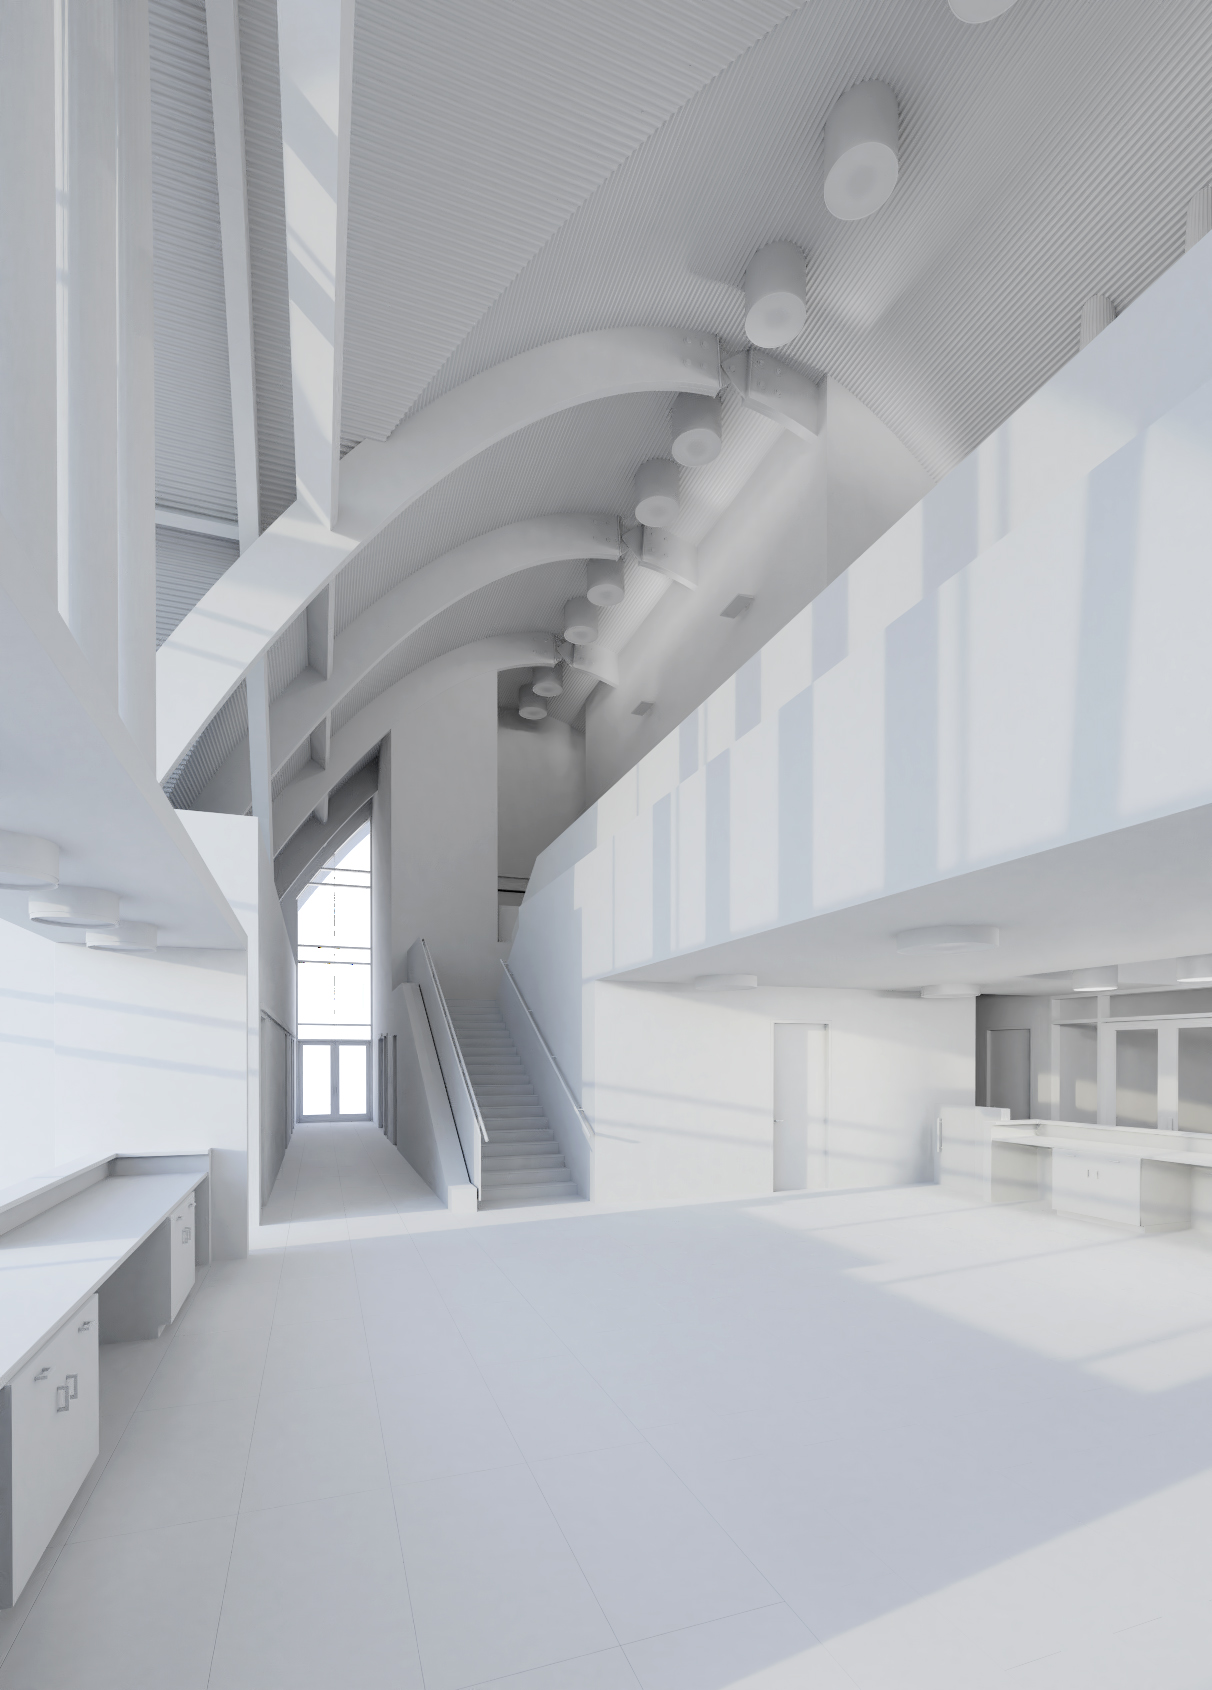
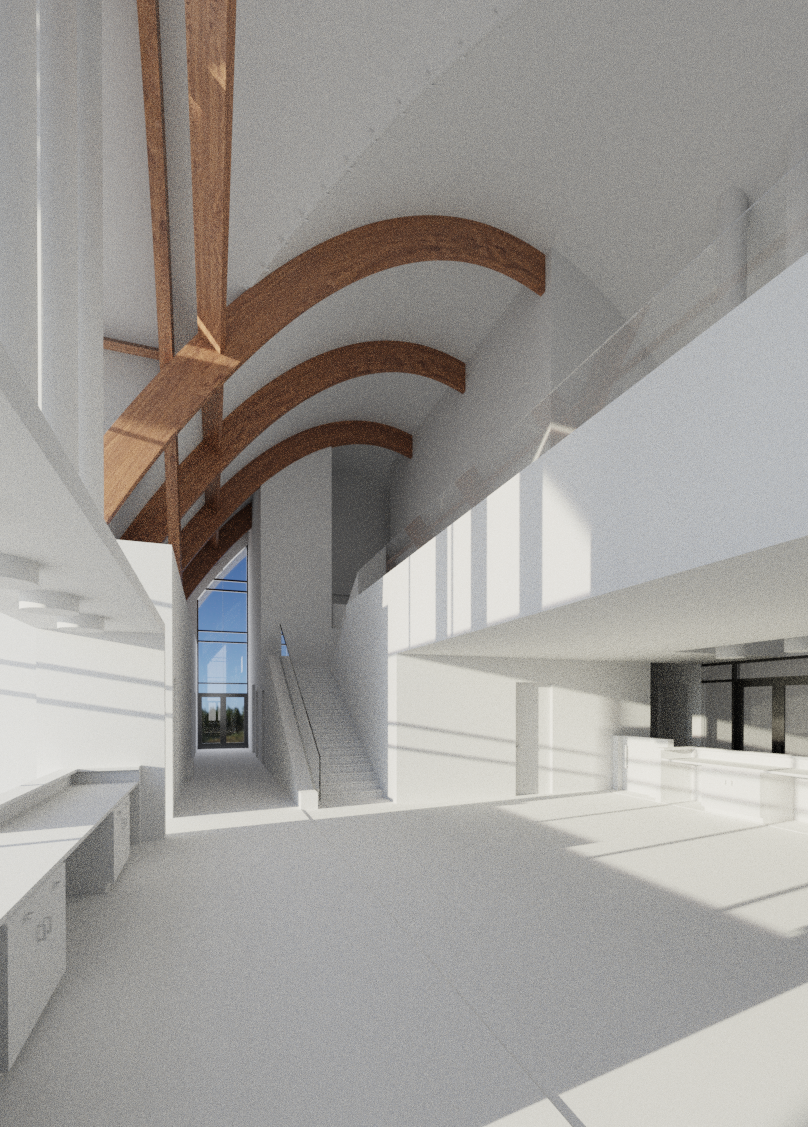
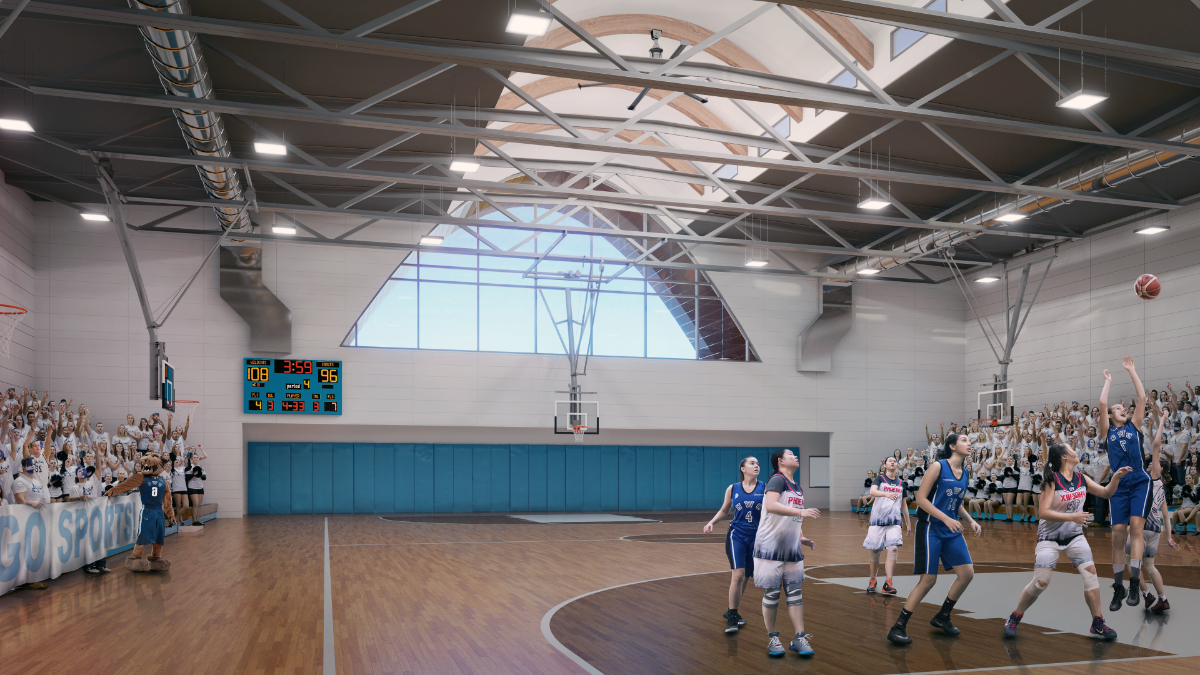
As the final visualization from the Legacy Magnet School project, we’re excited to present one of the interior shots. From the moment we first laid eyes on the client’s screenshot, we recognized its potential to become an exceptional image.
After importing the model into Blender, we meticulously positioned the camera. With a quick render showing promising results, we made minor adjustments to the camera position and began adding materials.
Lightning
It’s gratifying to witness how the interplay of light brightens and enhances the scene. In this particular image, we employed not only the HDRI map but also additional sources of light – interior lights. When incorporating interior lights, it’s essential to calibrate their strength meticulously. They should be visible and recognizable without overshadowing the primary light source.
Materials
From material choice the most eye-catching was texture of wood, ceiling and floor material. In Blender we tried to keep them simple but realistic as possible.
Render Settings
Creating a pleasing render involves understanding how the rendering engine operates. We utilized Blender’s Cycles renderer, emphasizing the importance of configuring all settings accurately to achieve the most realistic result. While higher quality often entails longer render times, particularly in interior scenes, the client’s satisfaction outweighs any rendering duration.
Once all details were fine-tuned with the client, the final step was to add images of people to breathe life into the space. While this task may seem straightforward, it can actually entail hours of meticulous work. We scoured internet portals for well-lit images that matched the scene, and in some cases, we had to cut them ourselves or even capture and prepare our own photos.
Subtle color adjustments were then applied to achieve the complete and final look.